
This is a quick blog post on how to configure IPSec VPN tunnels in Cloud Director with a NSX-T backed Edge node. To get this working, we need to configure the remote endpoint with the matching IPSec VPN configurations as in Cloud Director.
Requirements
In order to configure a site to site IPSec VPN tunnel in Cloud Director, you need to have the following requirements in place. These settings need to be matched with the remote endpoint configuration to perform a successful negotiation and have an active IPSec tunnel.
For more information on configuring IPSec VPN tunnels, you can have a look at the documentation at VMware.
Make sure to have the following information:
- Pre-shared Key or Certificate
- Local Endpoint IP Address
- Local Endpoint Networks
- Remote Endpoint IP Address
- Remote Endpoint Networks
- IKE Security Profile Settings
- Tunnel Security Profile Settings
Configure IPSec VPN tunnel
To configure IPSec VPN tunnel in Cloud Director, login to Cloud Director as tenant and click on Networking --> Edge Gateways and click on the Edge that will be used for the IPSec VPN Tunnel.

Select the Edge node to configure the IPSEC VPN Tunnel
Click on NEW to open the "Add IPSec VPN Tunnel" wizard.

Edge Gateway Network Services
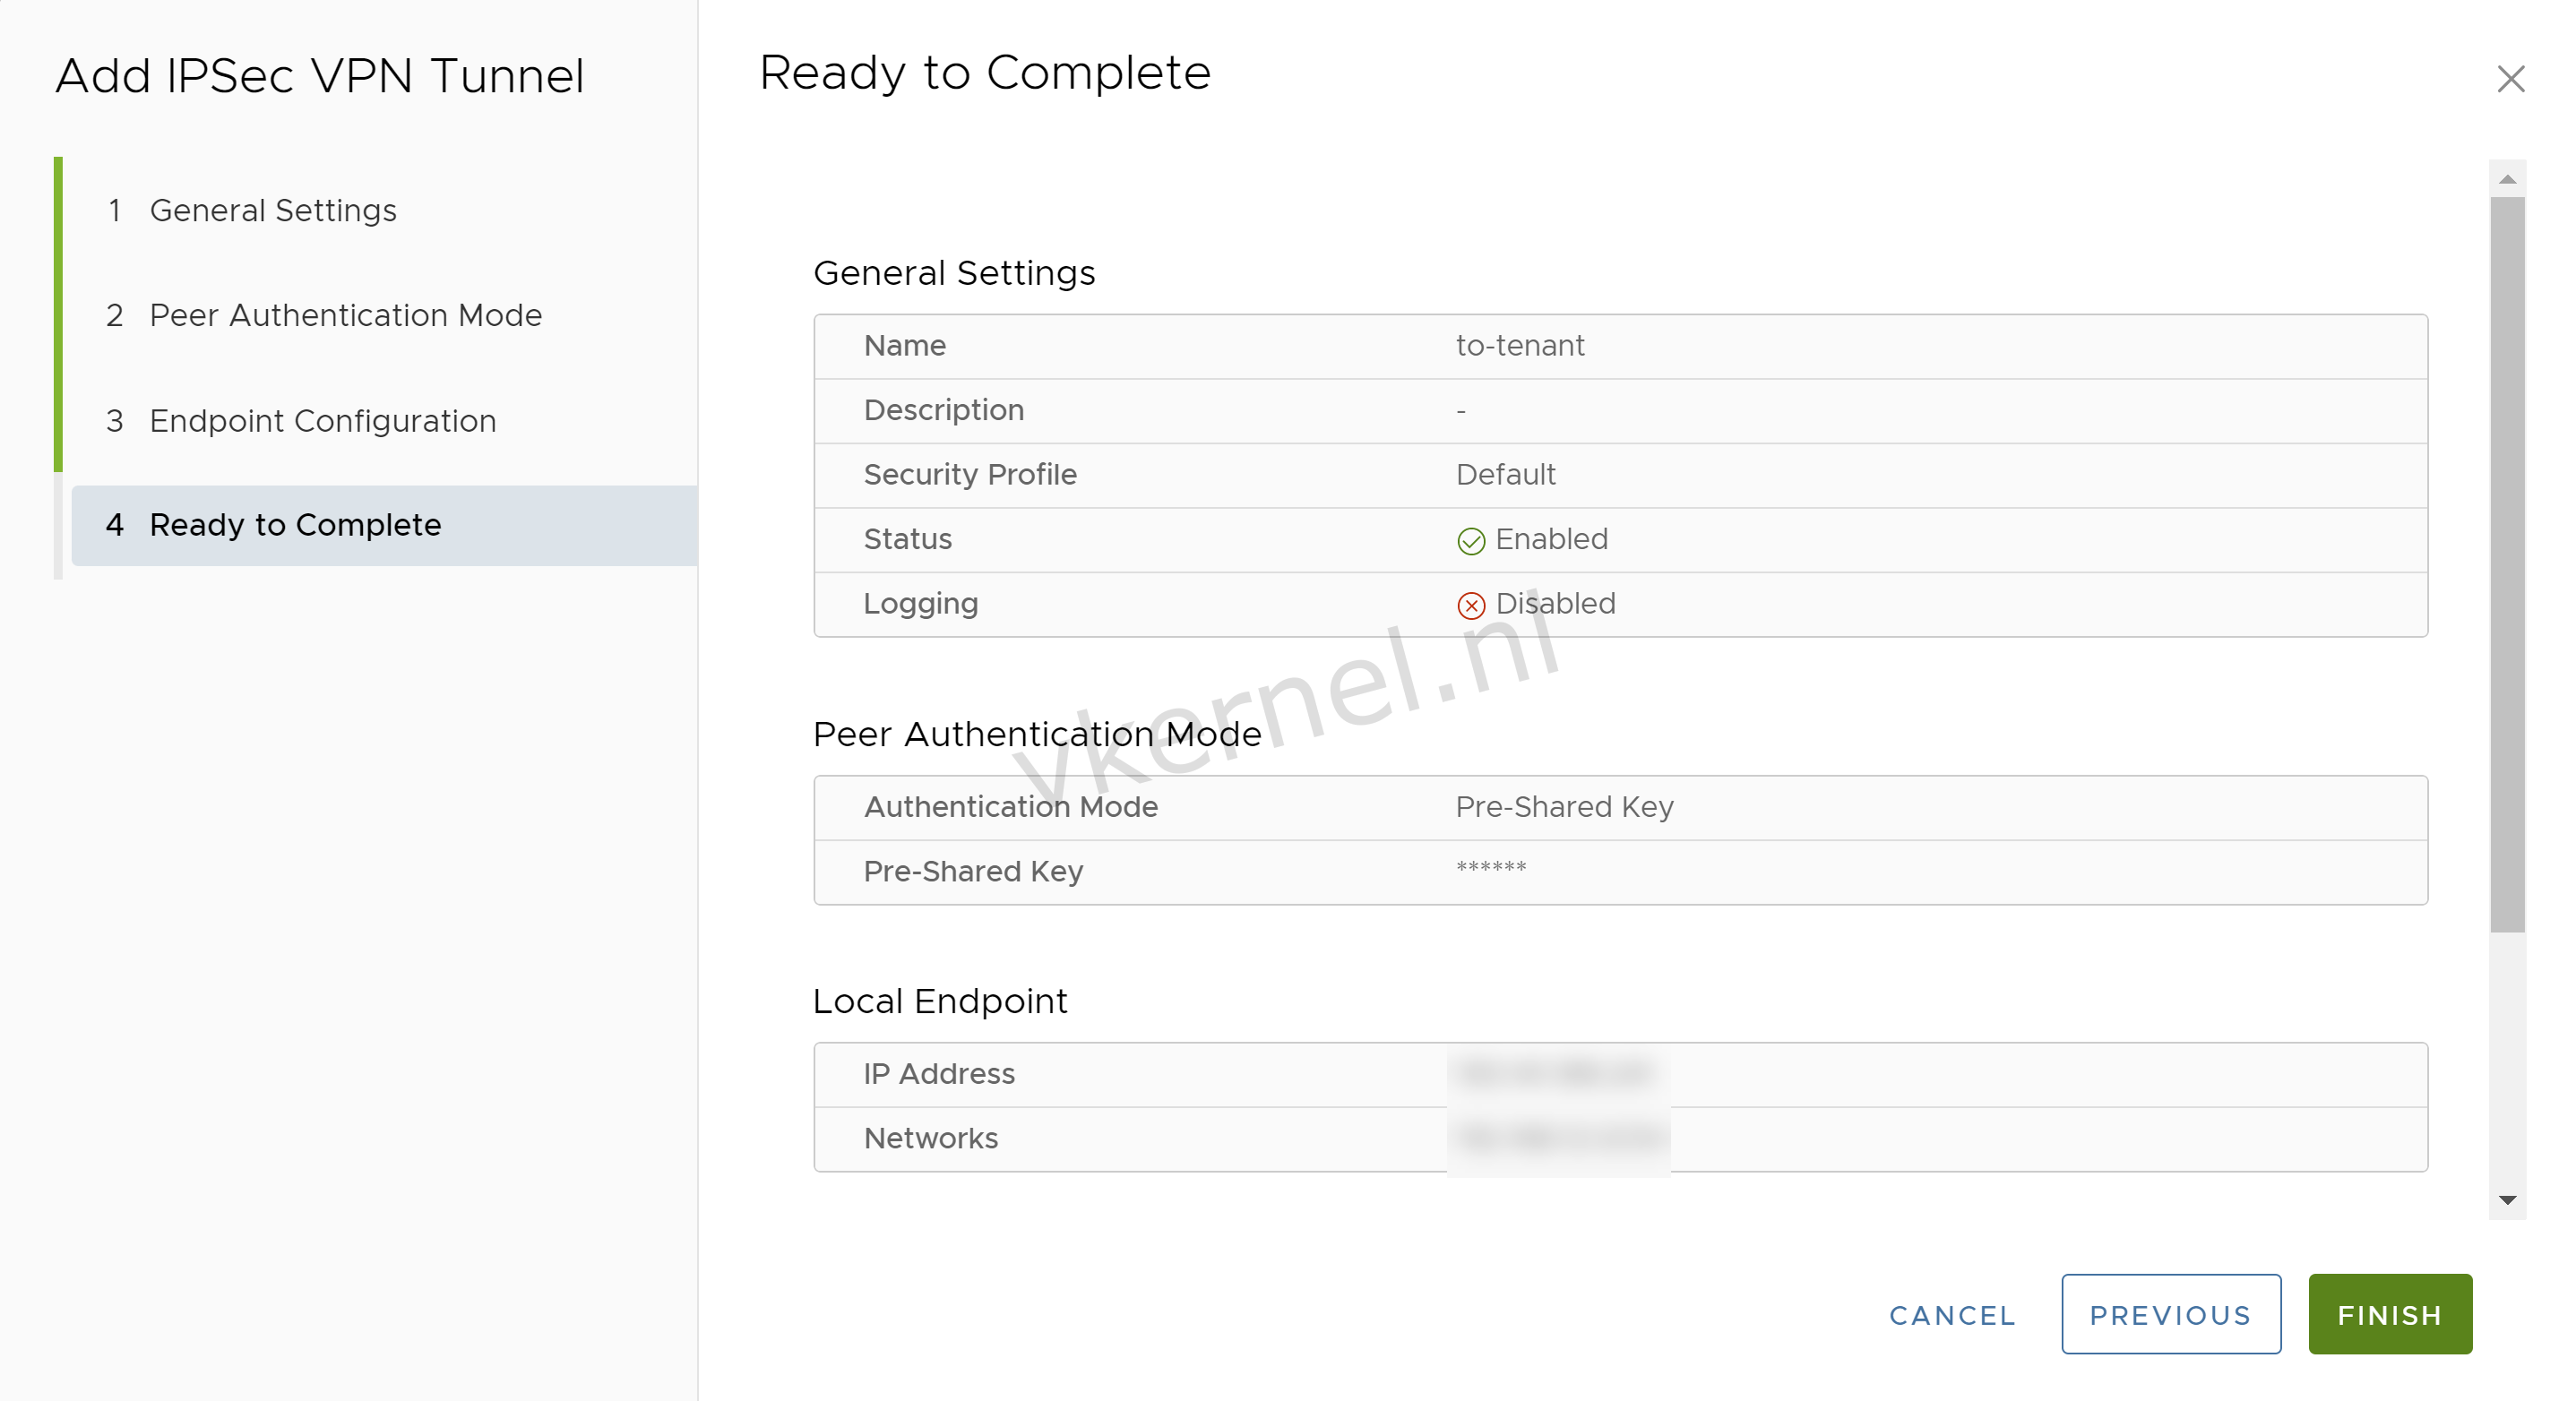
In the General Settings, we need to enter a Name. (I have configured other options as default)

IPSec VPN Security profile
In this example, I'm using the Pre-Shared Key as authentication mode.
Note: Keep in mind that the Pre-Shared Key need to match the Pre-Shared Key in the remote endpoint

IPSec VPN Authentication Mode
Next step is to configure the Endpoint Configuration. Enter a public IP Address that is available on the Edge as Local Endpoint IP Address and configure an local IP subnet in the Networks field, that you would like to use for the IPSec VPN tunnel.
As for the Remote Endpoint section, we need to enter the public IP Address from the remote endpoint in the Remote Endpoint IP Address and configure a remote IP subnet in the Networks field.

IPSec VPN Tunnel Configuration
Pre-shared key authentication
IKE Phase 1 Settings
IPSec Tunnel Phase 2 Settings
Perfect Forward Secrecy Settings

Phase 2 Hashing Algorithm Settings
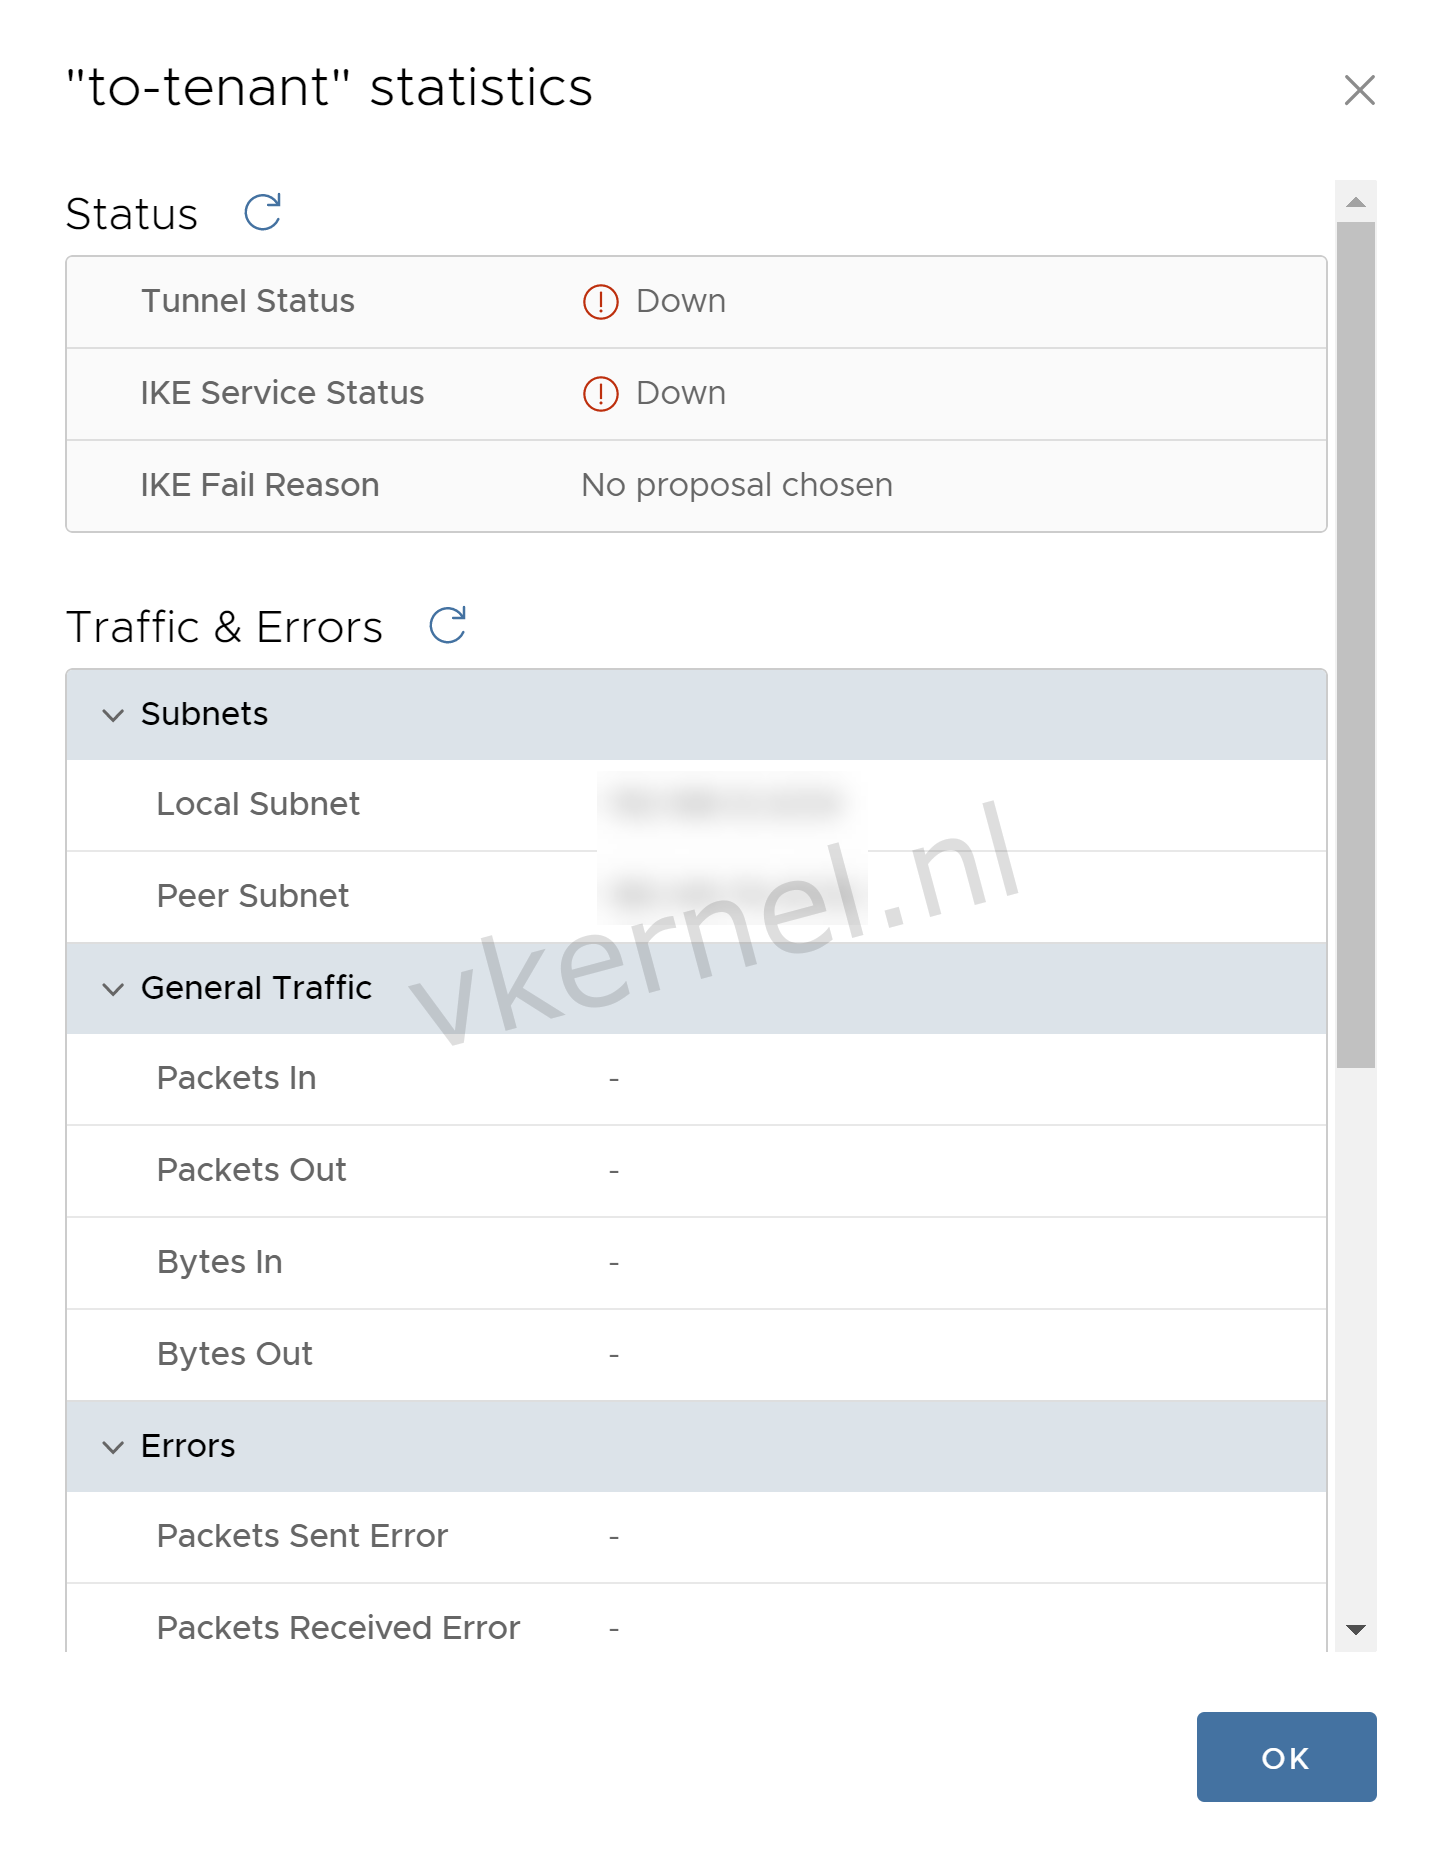
When we check the statistics of the IPSec VPN tunnel, you will see that the tunnel is down. This is because of the IKE and Tunnel Security Settings that has not yet been configured with the correct settings. We will configure these settings in the next steps.
The IPSec VPN tunnel is down.
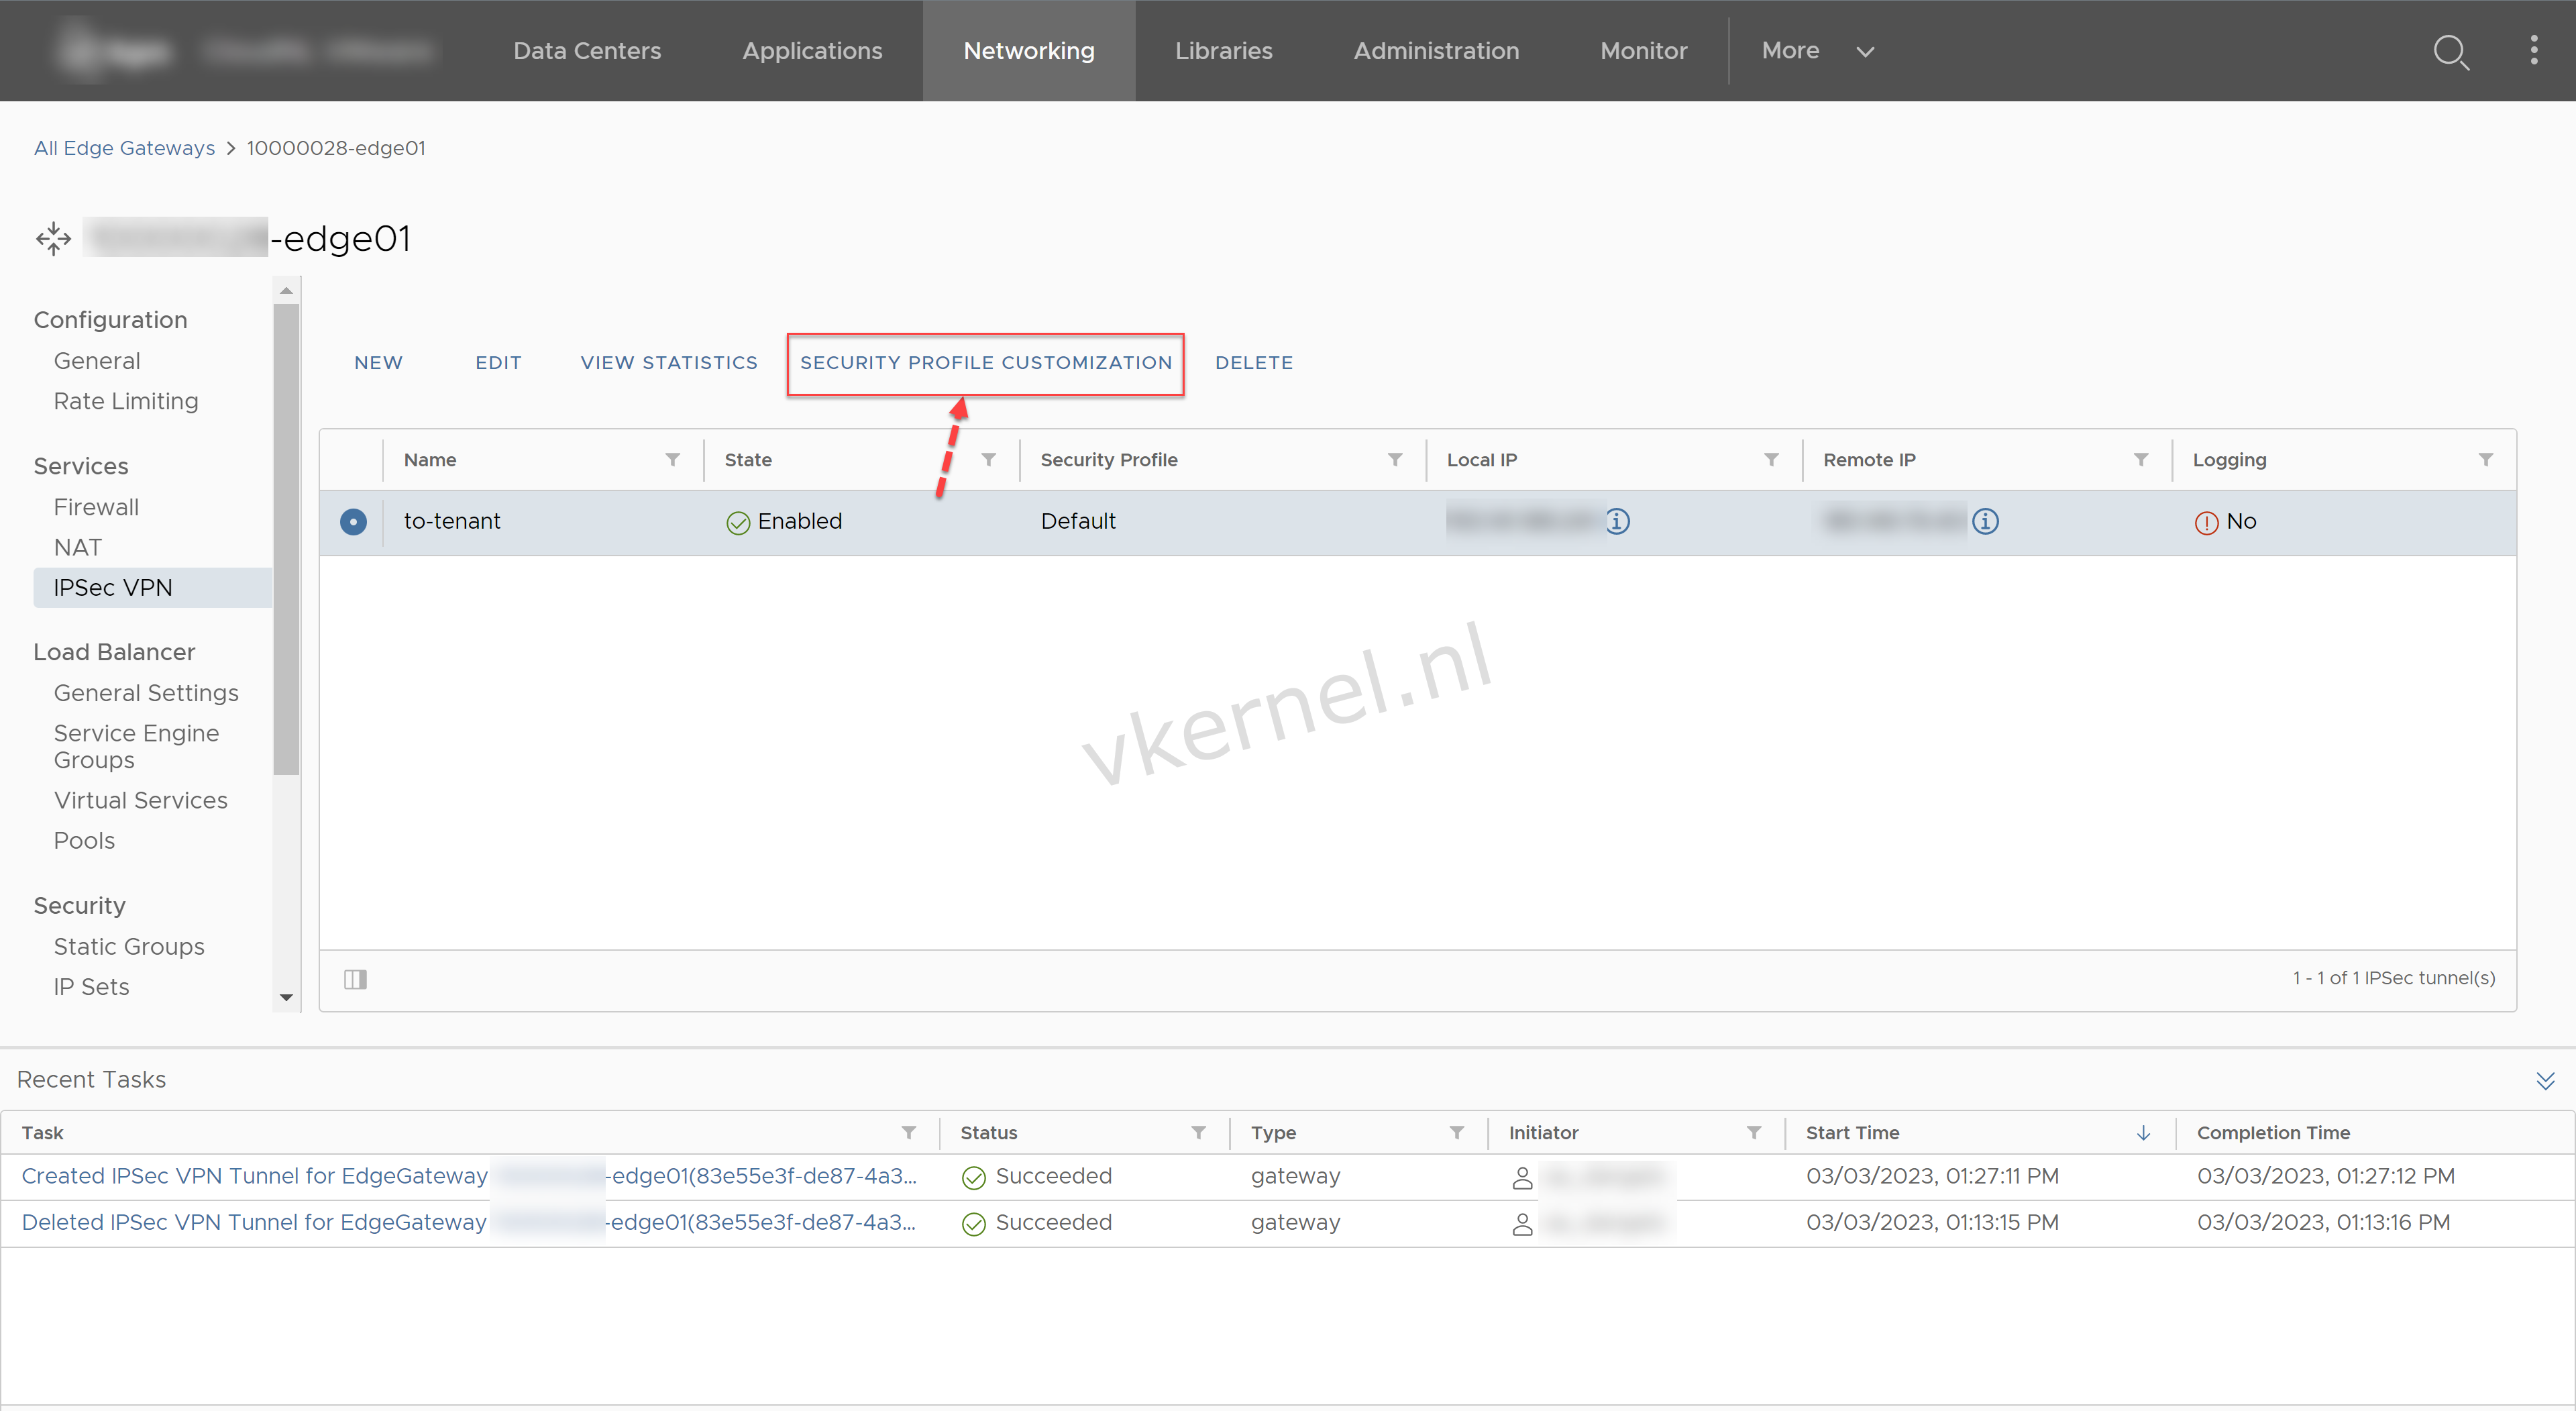
In the IPSec VPN view, select the IPsec VPN tunnel and click on Security Profile Configuration to configure the settings.
Click on Security Profile Customization.
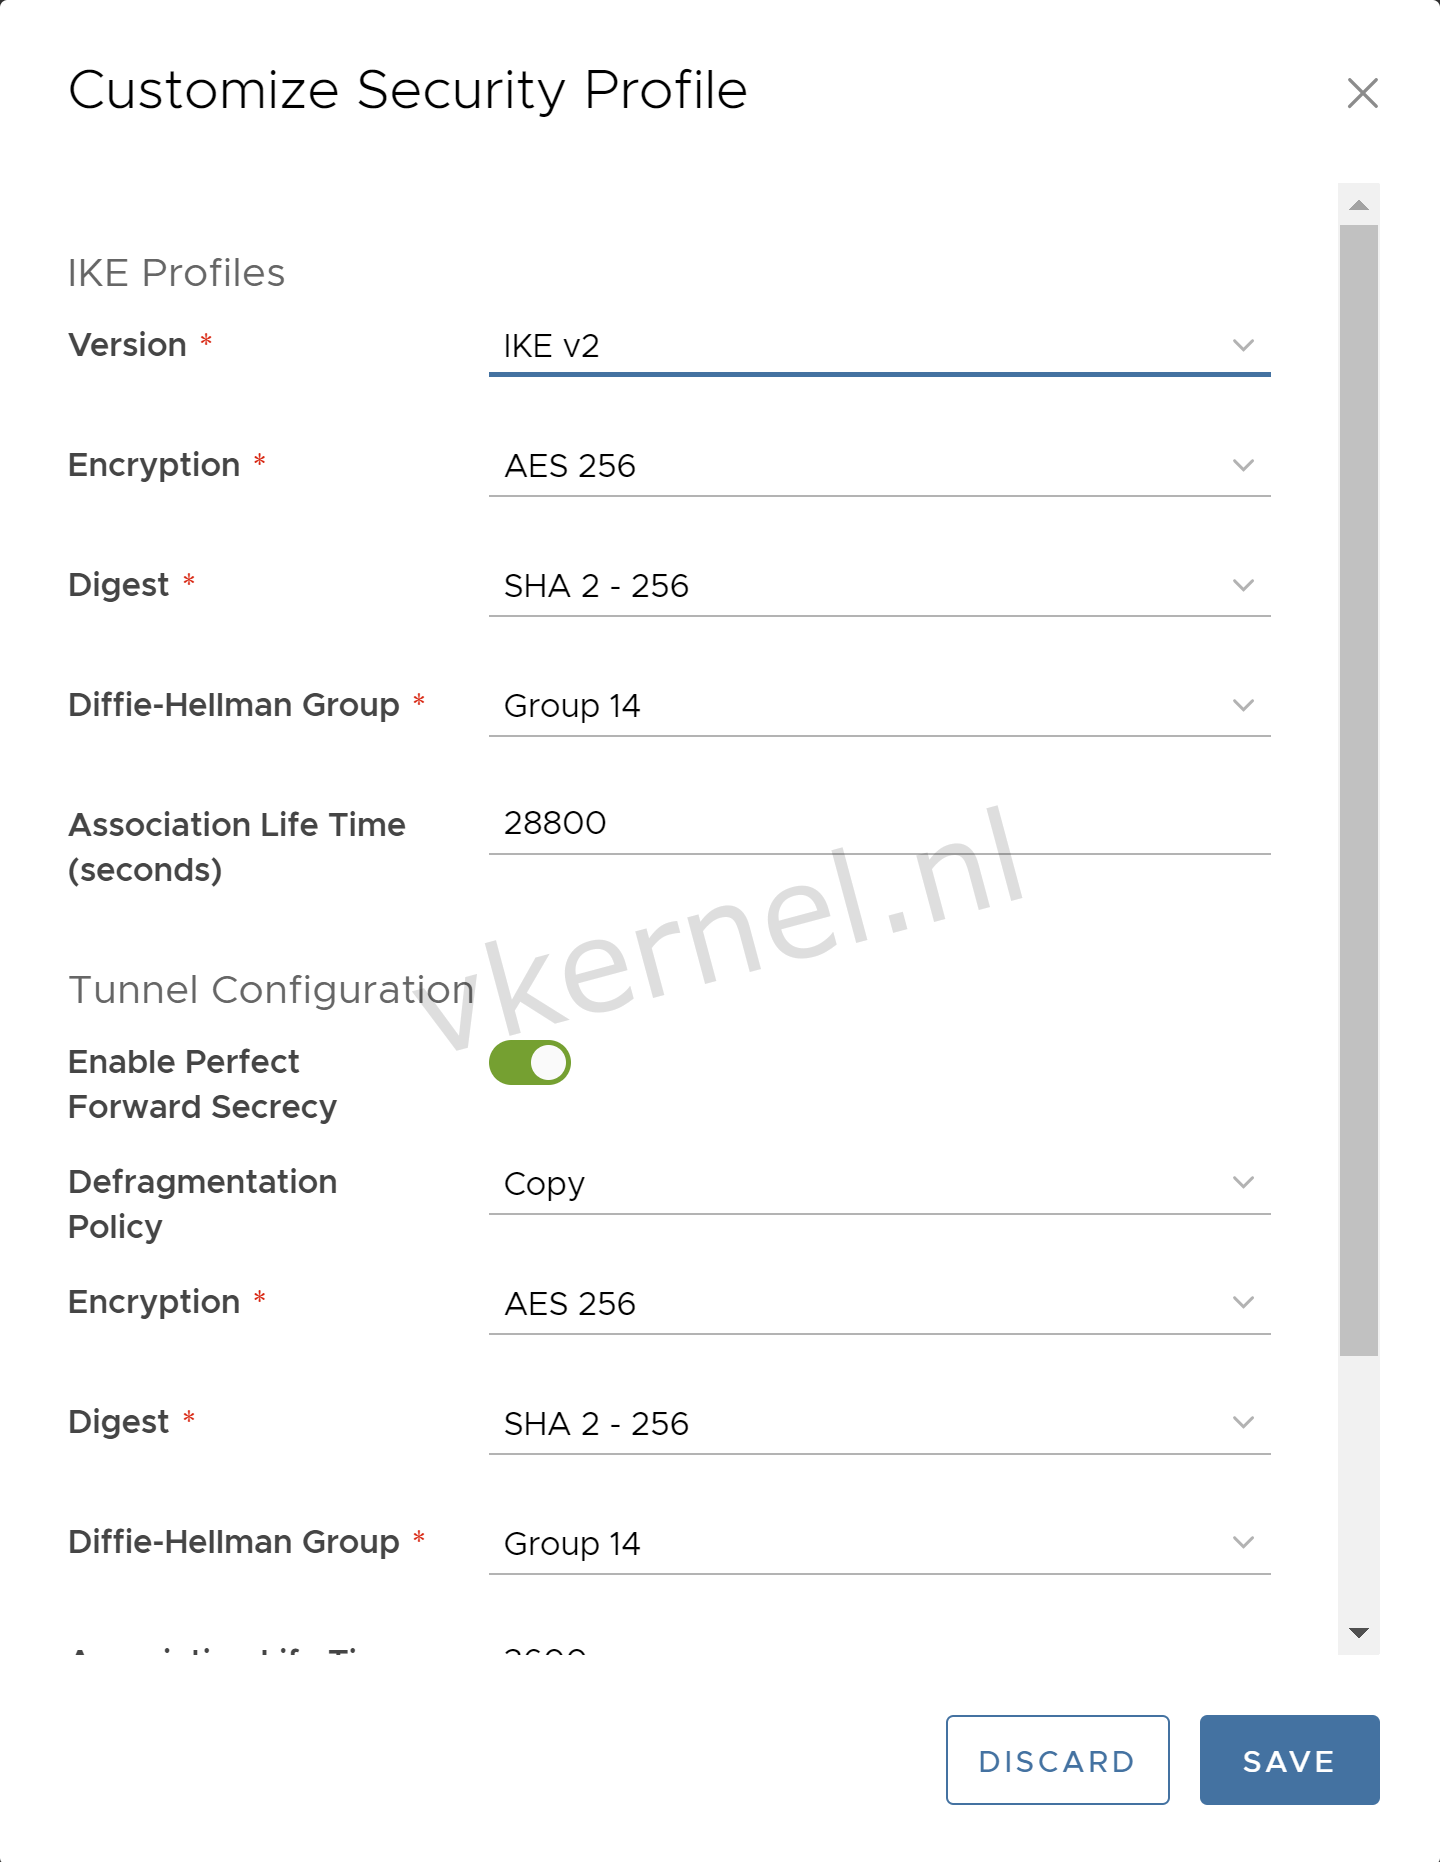
Enter the Customize Security Profile with the desired security settings that has been agreed with the remote endpoint.
Note: Keep in mind that the security settings need to match the security settings in the remote endpoint
Enter the Security Profile Settings
After a few minutes, you will see that the tunnel and IKE status will be shown as "Up" in the statistics of the IPSec VPN tunnel.
Tunnel and IKE status is UP.
We now have succesfully configured an IPSec VPN tunnel between Cloud Director and a remote endpoint (in my case a Palo Alto endpoint).
Final Words
When the IPSec VPN tunnel is up and running, you should be able to communicate between the local endpoint networks and the remote endpoint networks. If you are still unable to communicate between the local and remote subnet, you should check the firewall settings on the virtual or physical network.