HA support for the Cloud Director nodes were introduced in version 9.7 and has been improved in the 10.1 release. In Cloud Director 9.7 the only failover method was manual. So in case of a failed primary database node, the failover need to be manually initiated from the web console: https://vcloud.domainname.com:5480 That all changed in Cloud Director 10.1!
In this blog post, I will show you how to configure the failover method to automatic, and I will show you how to replace a primary failed node with a new standby node. This article is based on Cloud Director version 10.2.
Failover methods: manual vs Automatic
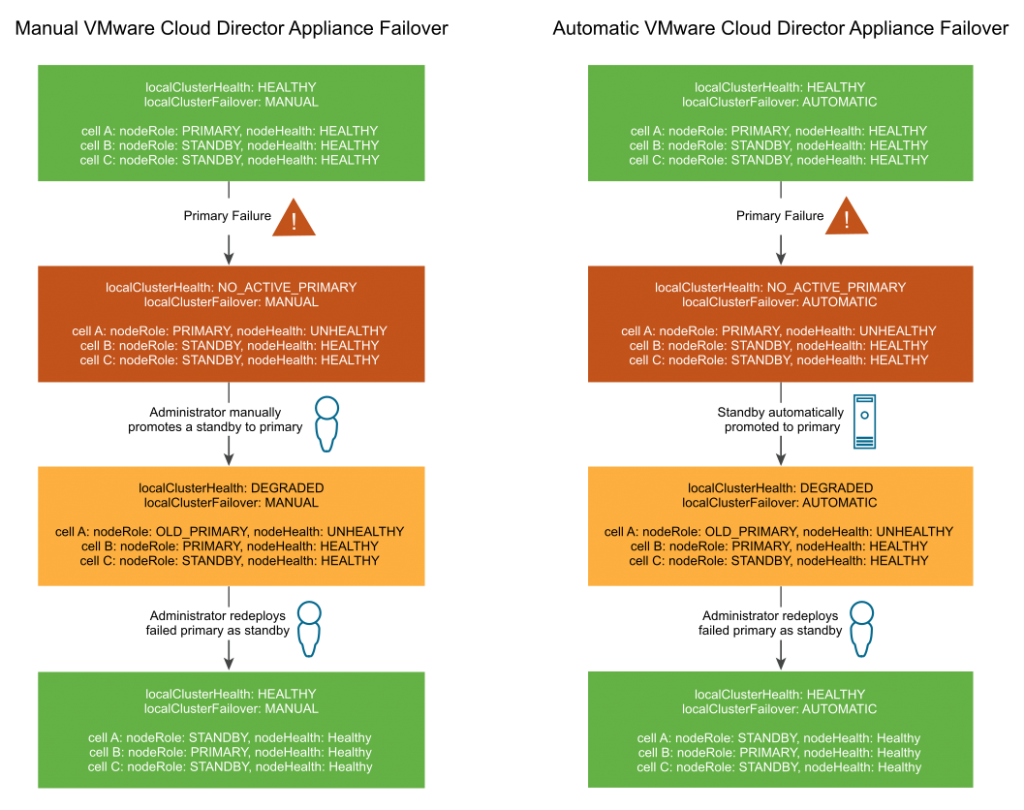
As I already mentioned before, the Cloud Director HA setup is now able to perform a automatic failover when the primary database node fails. In the picture below, you see on the left side the manual failover process and on the right side the automatic failover process. The only difference between the two processes is the automatic failover process. It still require manual redeployment of a new standby node after a failed primary node.
Perform manual failover
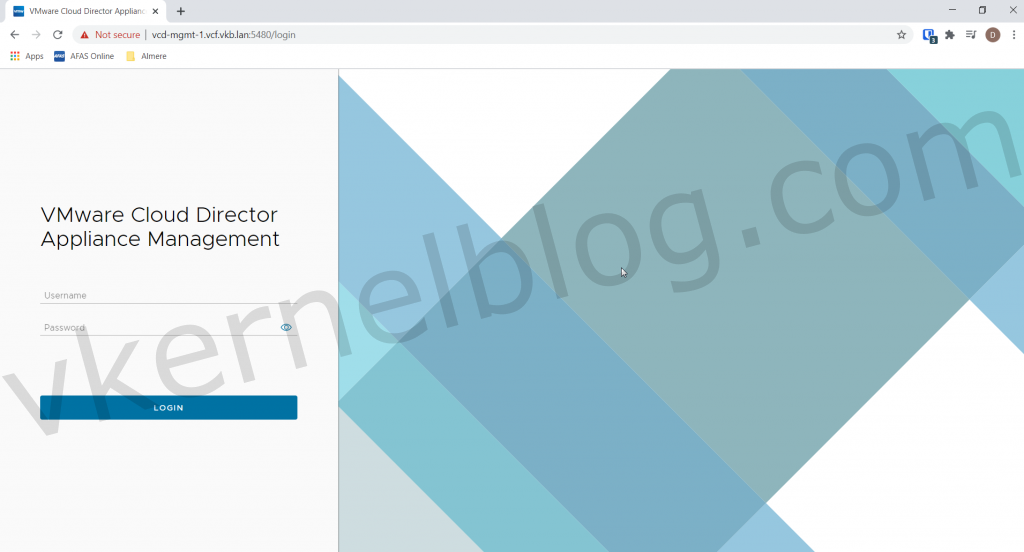
After you have deployed a Cloud Director HA setup, the failover method is by default configured as manual. Let's start with demonstrating the manual failover method. How can you initiate a manual failover? That can be performed from the Cloud Director console. To do so, login on the Cloud Director web console: https://vcd-node:5480
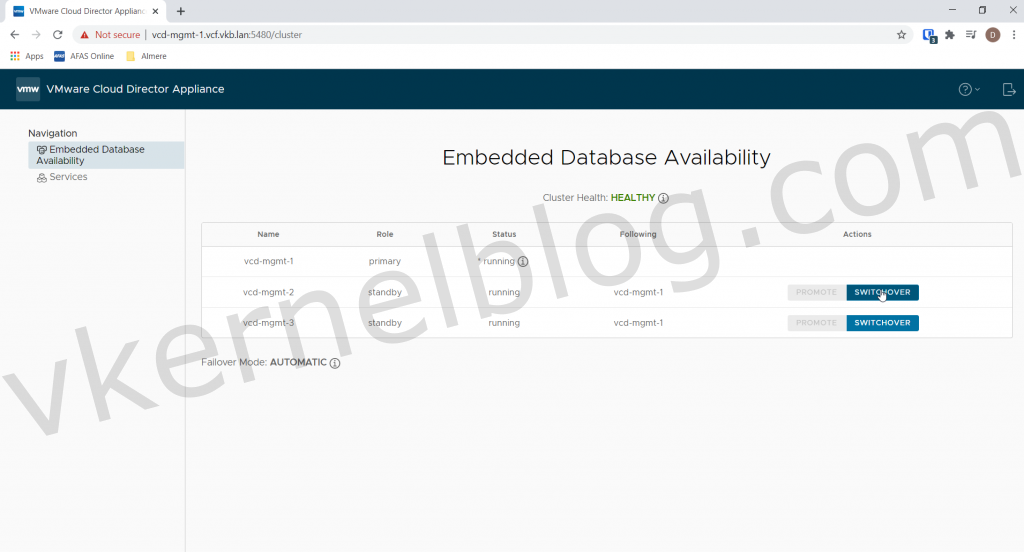
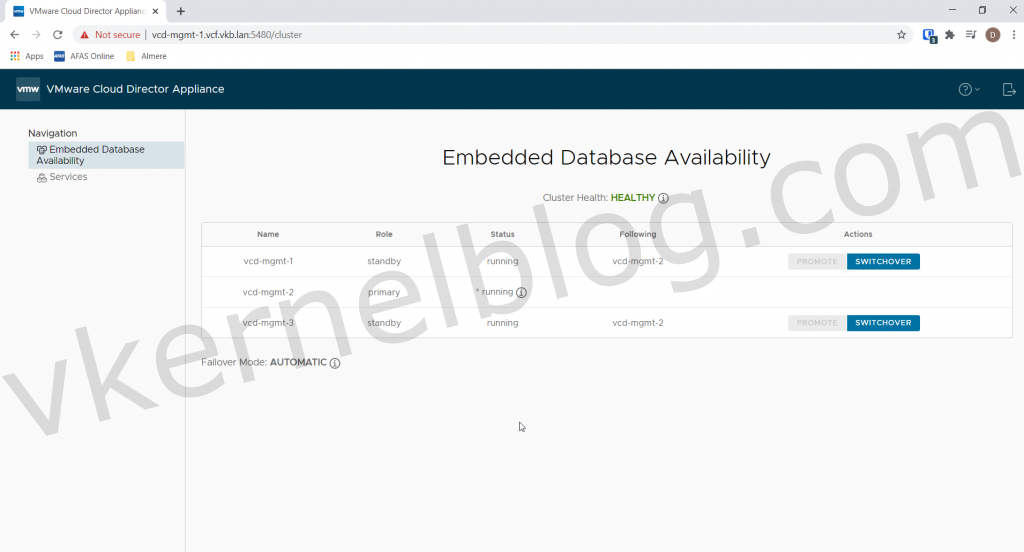
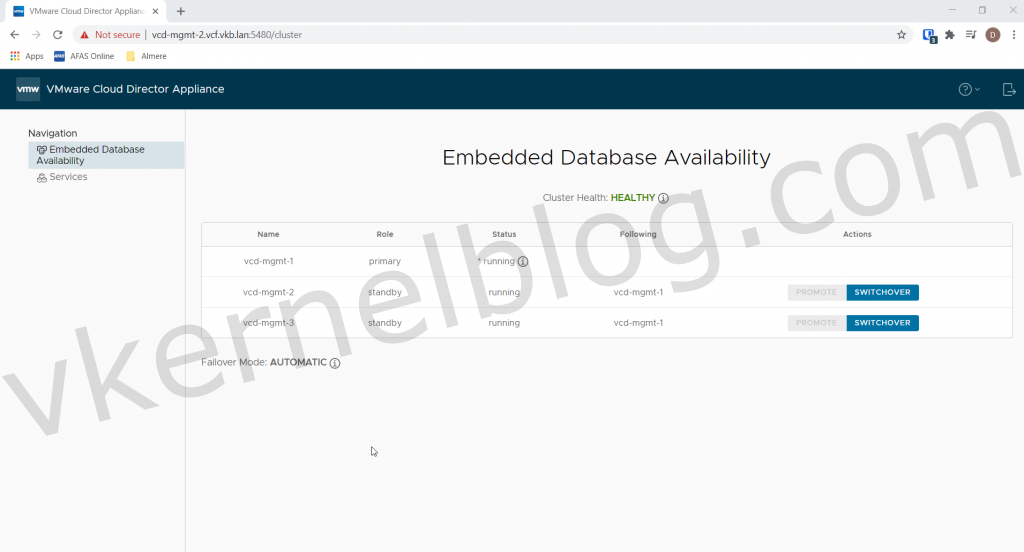
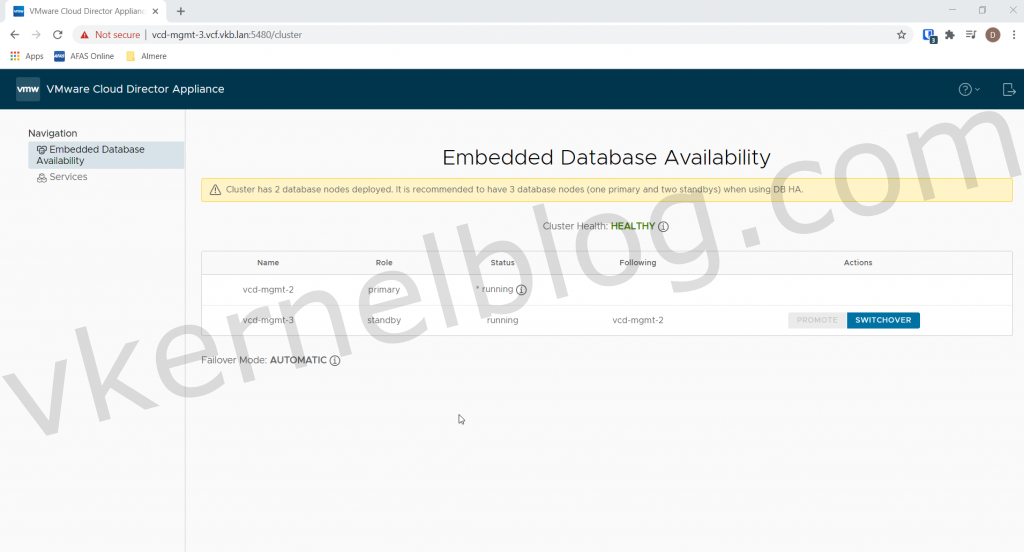
After logging in to the Cloud Director web console, you will see the embedded database availability page. On this page you can see all the available Cloud Director cells and their current state (Primary or Standby).
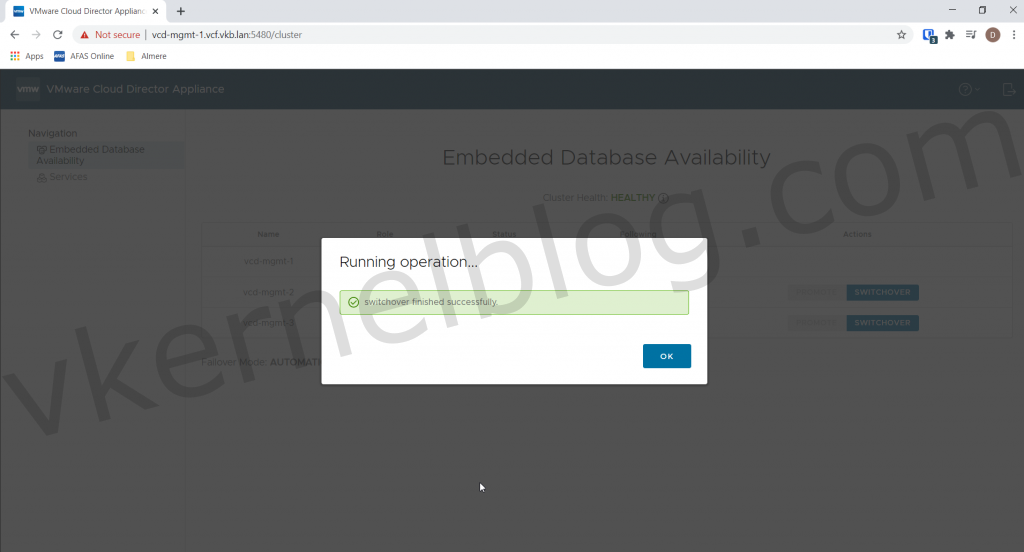
The primary database node is currently the vCD-mgmt-1 (as shown in the previous picture). To initiate a failover to the second cell (vCD-mgmt-2), we only have to click on the switchover button of that cell.
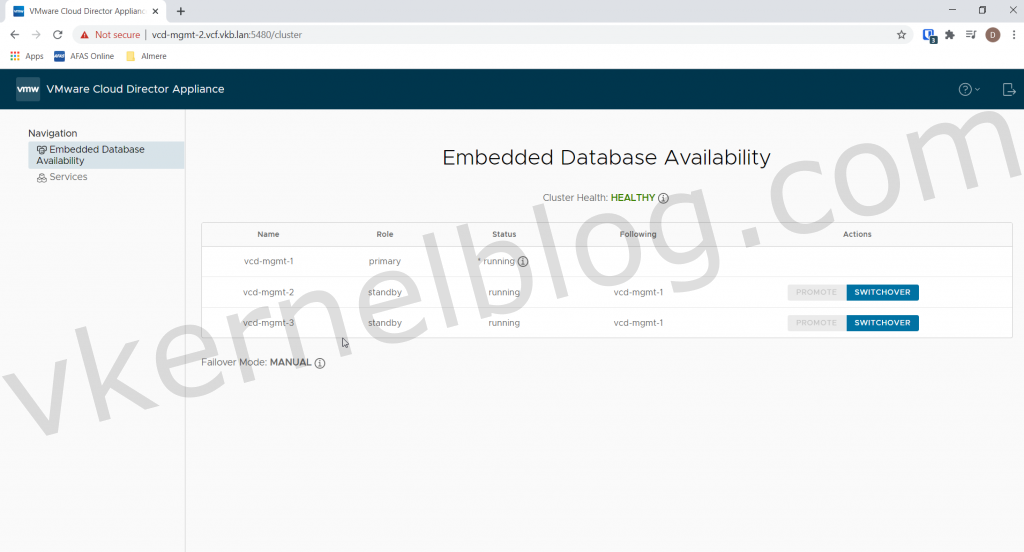
As you can see, Cloud Director cell named vCD-mgmt-2 is now the primary database node.
How to configure the automatic failover mode
As mentioned before, the default failover method is manual. It is unfortunately not possible to change the failover method to automatic from the Cloud Director web console. The only way to change this is by using the API from Cloud Director.
Failover method is by default manual.
There are several ways to communicate to the Cloud Director API, please see the following link for additional information on using the Cloud Director API.
Note: The Cloud Director Appliance API can be used to get and change the state information of your Cloud Director appliances. The API is only accessible on port 5480. This API only returns JSON formatted data.
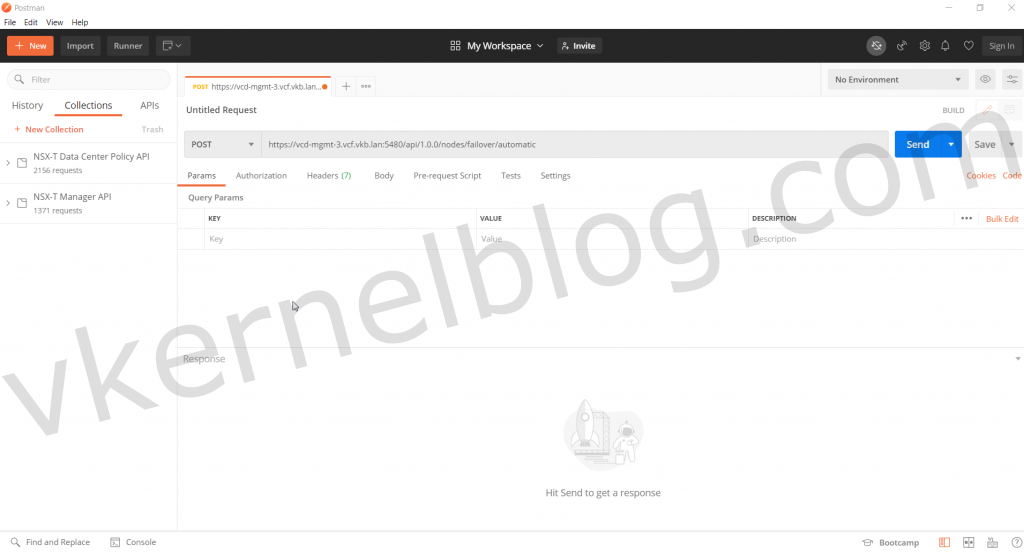
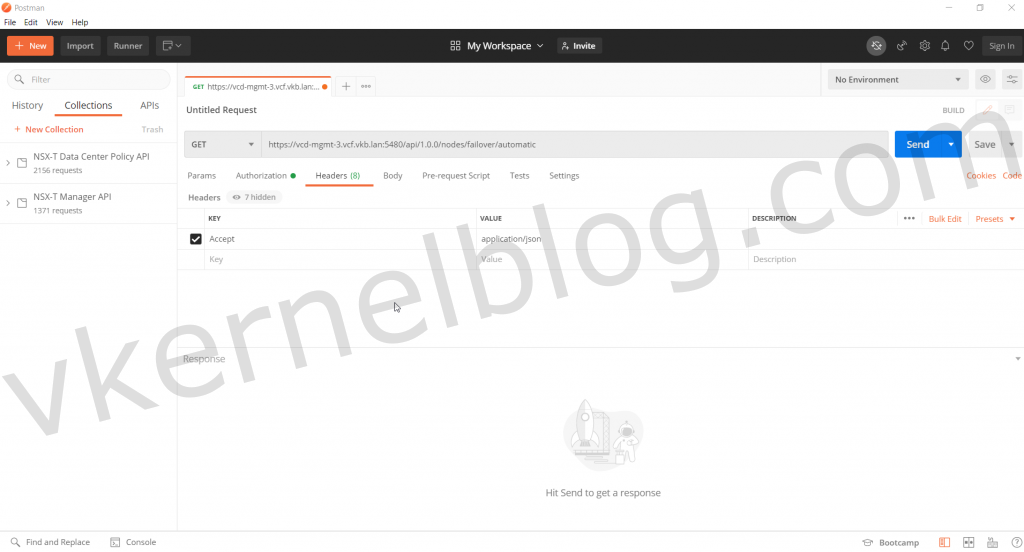
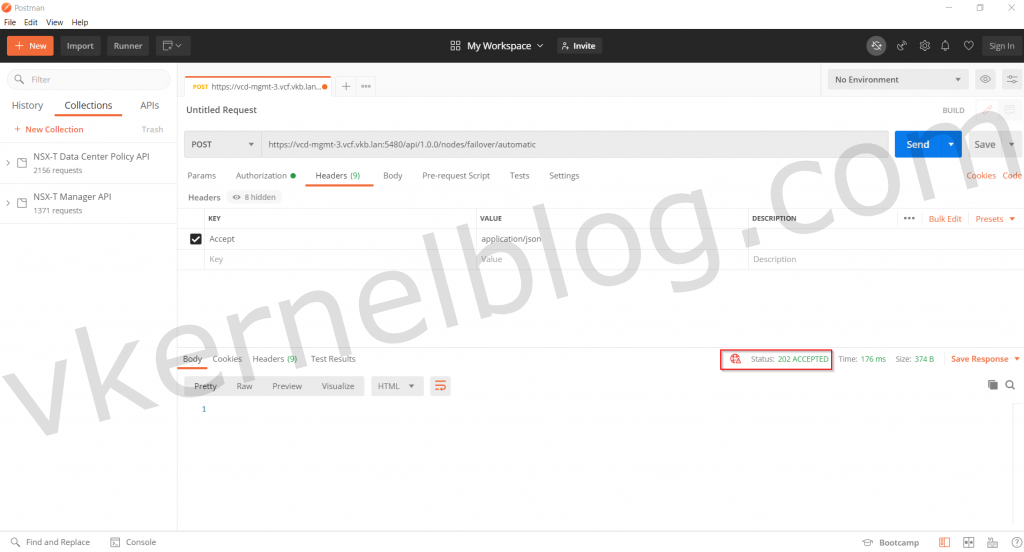
In my case, I used postman to connect to the Cloud Director API. Open Postman, change the HTTP Request to POST and change the Request URL to "http://vCD-node:5480/api/1.0.0/nodes/failover/automatic". It doesn't matter which node you use, the configuration will be applied on all the nodes.
Note: To switch back to manual mode, use the following Request URL: "http://vCD-node:5480/api/1.0.0/nodes/failover/manual"
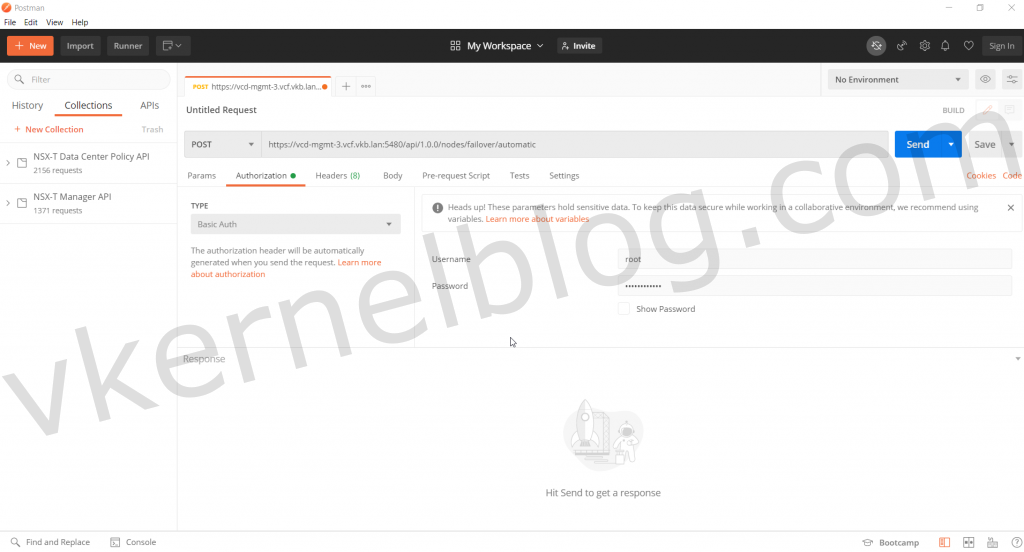
Configure the root credentials of the Cloud Director cell in the authorization tab as shown below:
Use the root credentials of de Cloud Director cell.
Add the following configurations in the headers tab:
- Accept: application/json
We are now ready to send the API call to configure the failover method to automatic. Click on the blue send button to send the API call. Make sure to verify the status of the API call. Expected status should be 202 ACCEPTED.
We now have successfully changed the failover method from manual to automatic. To verify the change, go to the Cloud
Remove the failed primary node
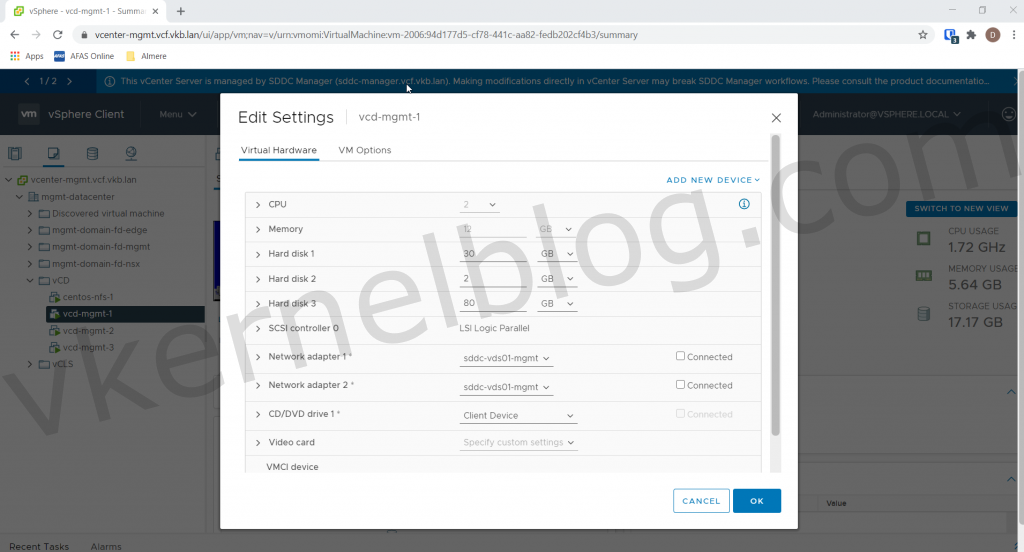
In this example, I will simulate a failure of the primary node (vcd-mgmt-1) by disconnecting the NICs in vCenter. So let's start with logging in to the vCenter server and edit the settings of the vcd-mgmt-1 node:
I have deselected the connected checkbox of the NICs
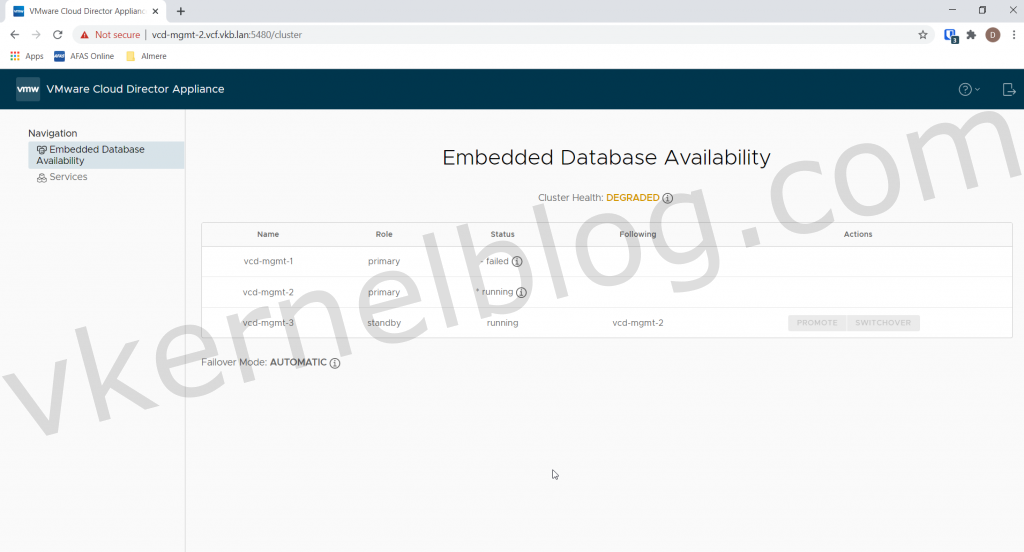
As you could see in the picture below, the Cloud Director cluster health status has been changed to status degraded. The vcd-mgmt-2 node has become the new primary node during the automatic failover and the vcd-mgmt-1 has the status failed.
Remove cell from Cloud Director
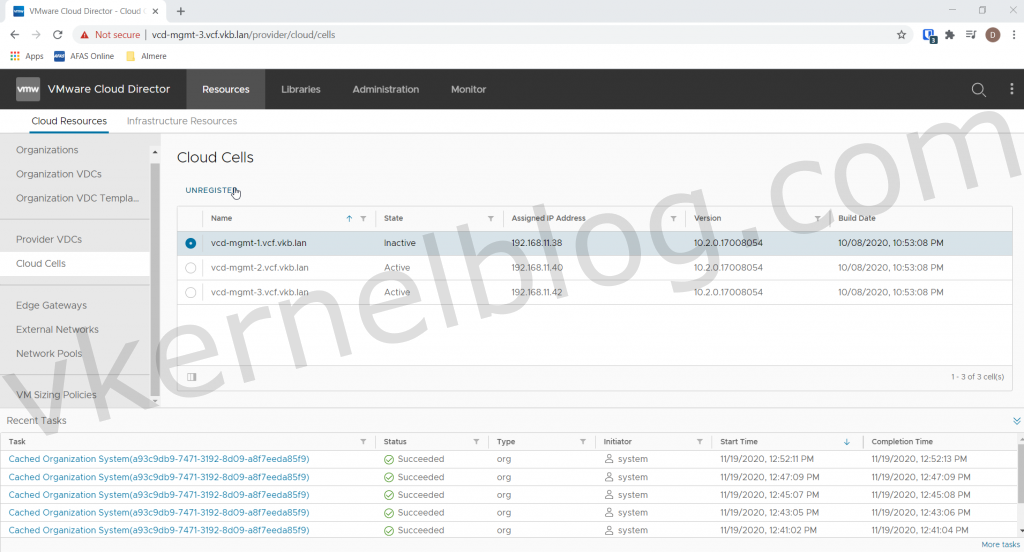
The only way to have healthy cluster again is to redeploy the vcd-mgmt-1 node. First of all, we need to remove the vcd-mgmt-1 cell from the Cloud Director cluster. To do so, open the provider web GUI and go to Resources --> Cloud Resources --> Cloud Cells and select the inactive node and click on unregister.
Unregister cell from the repmgr cluster
The next step is to remove the cell from the repmgr cluster as well. Open a putty session and login as root to any of the other nodes that are still running.
sudo -i -u postgres
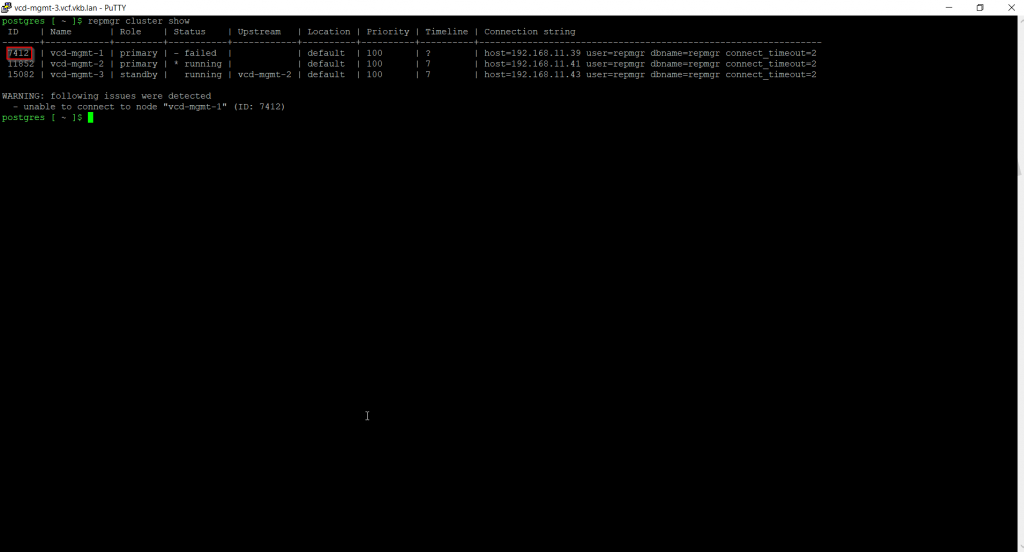
Use the following command to show the nodes in the repmgr cluster with their status. We are looking for the failed vcd-mgmt-1 node that should be in a failed state.
repmgr cluster show
Make a note of the vcd-mgmt-1 ID.
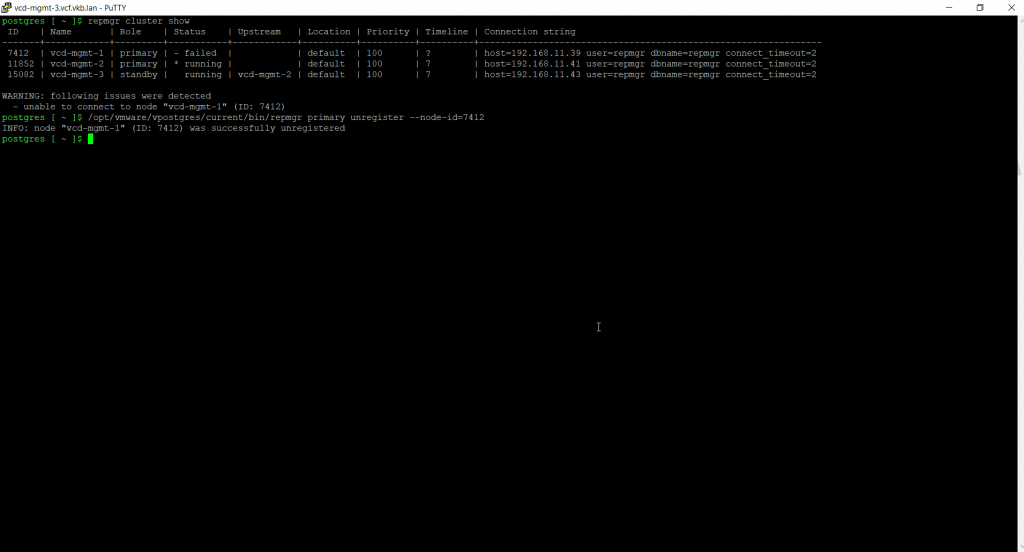
Use the following command with the ID of the failed primary node to remove the failed node from the repmgr cluster:
/opt/vmware/vpostgres/current/bin/repmgr primary unregister --node-id=node ID
We now have successfully removed the failed Cloud Director node from the repmgr cluster.
To verify this, open any other Cloud Director node web console and you should see that the failed node has been removed. The cluster health should be healthy again and we are able to deploy a new standby node with the previous cell name.
Summary
I hope that this article could help you out with configuring and testing your Cloud Director HA setup. If you need any help or you have some questions on this topic, please do not hesitate to contact me.

