Once your VCF management domain is fully operational, you may want to set up a VI Workload domain to deploy your workloads. In this article, we will guide you through the process of deploying a VI Workload Domain with vVols in VCF 5.1.1. For our example, we will use Pure Storage to create a vVol datastore.
Prerequisites
Before beginning the process of deploying a VI Workload Domain, be sure to review the prerequisites on the VMware website. This will help ensure that you don't encounter any issues during the deployment.
Network Pool
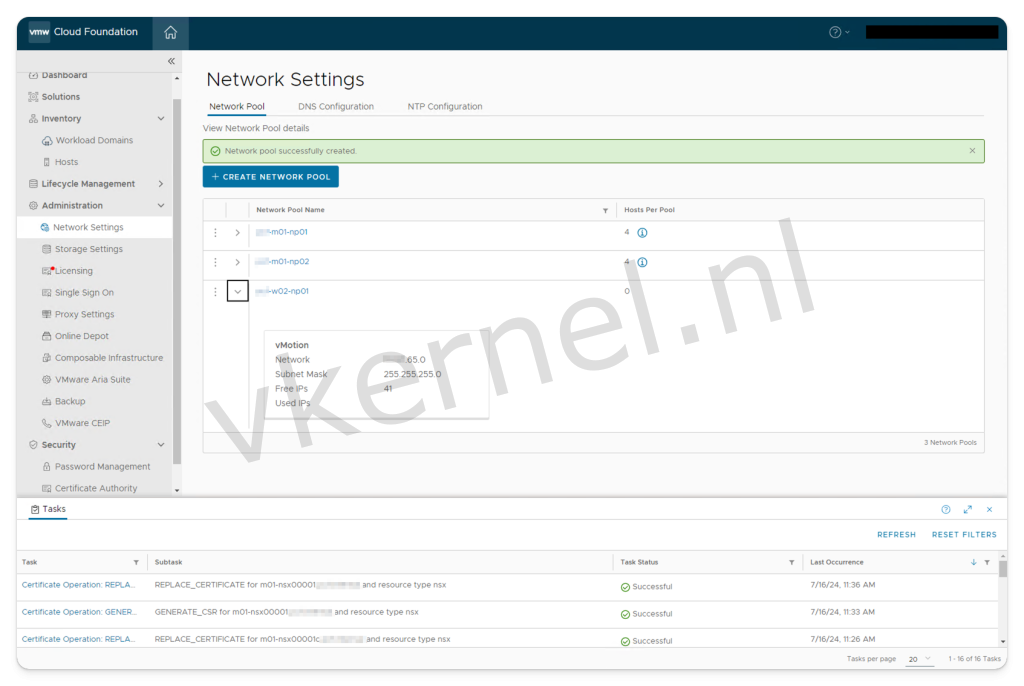
Let's start with creating a new network pool that will be used by the VI Workload Domain. We will select this new network pool during the deploy new VI Workload Domain Wizard.
VASA Provider
We have chosen to use vVols as the primary storage for the new VI Workload Domain. To do so, we need to add a new VASA provider with the details of the VASA provider hosted on the Pure Storage device.
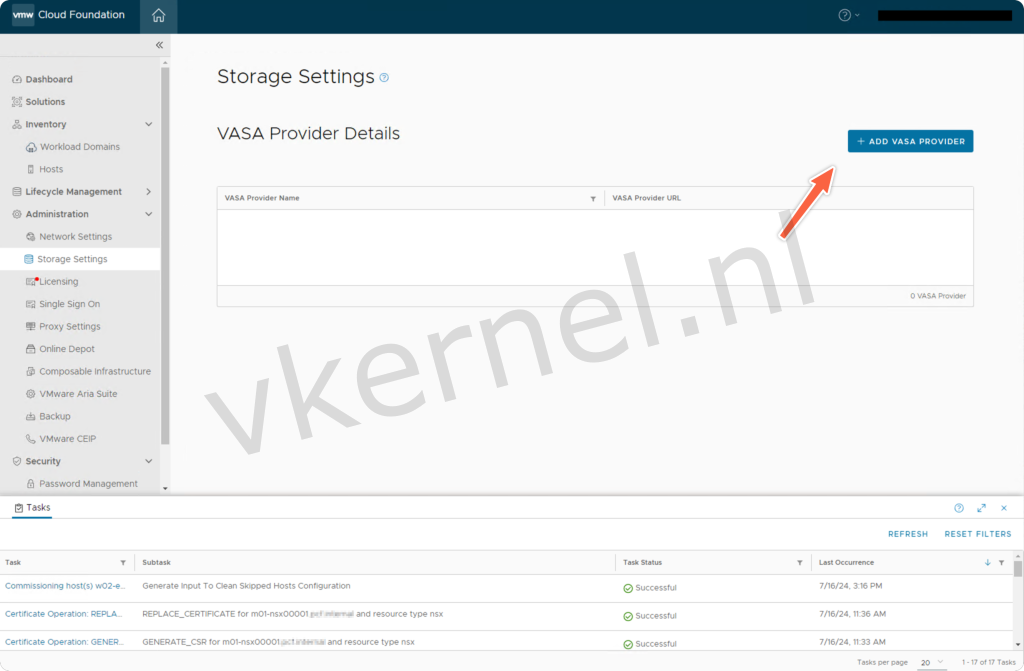
Click on Administration, then Storage Settings, and select Add VASA Provider to add a new VASA Provider in the SDDC Manager.
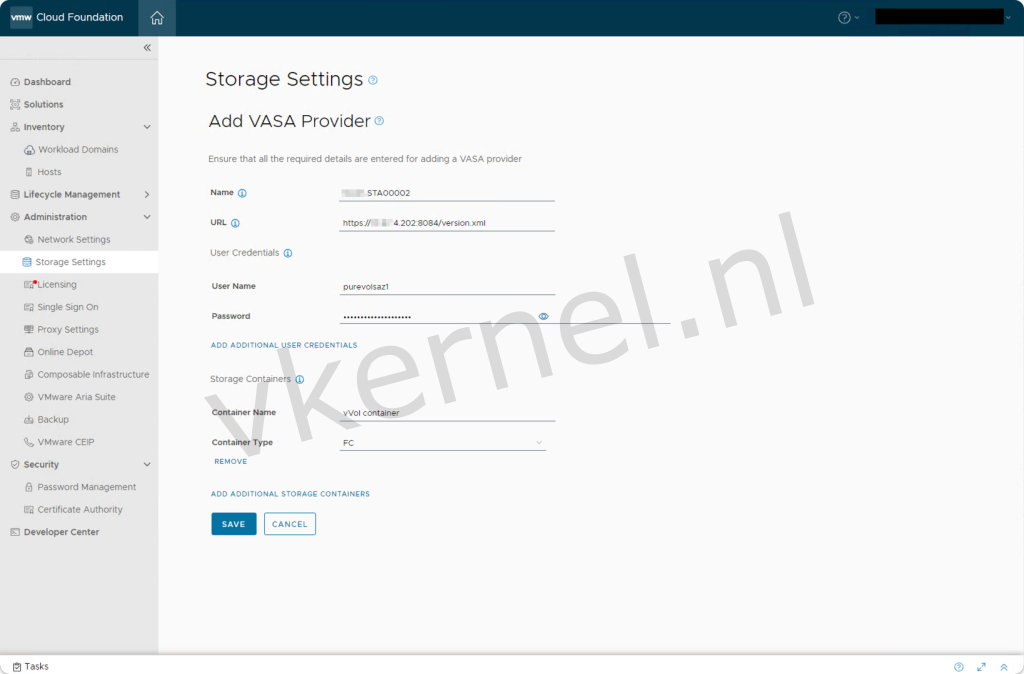
Fill in the details of the VASA provider:
| Setting | Value |
|---|---|
| Name | The name of the new VASA Provider in the SDDC Manager |
| URL | The URL of the VASA Provider hosted on the storage device |
| Username | The username that has permission to the VASA Provider on the storage device |
| Password | Password of the username |
| Container Name | Container name associated to the VASA Provider |
| Container Type | Container type associated to the VASA Provider |
Click on the save button to add the VASA Provider
Commission Hosts
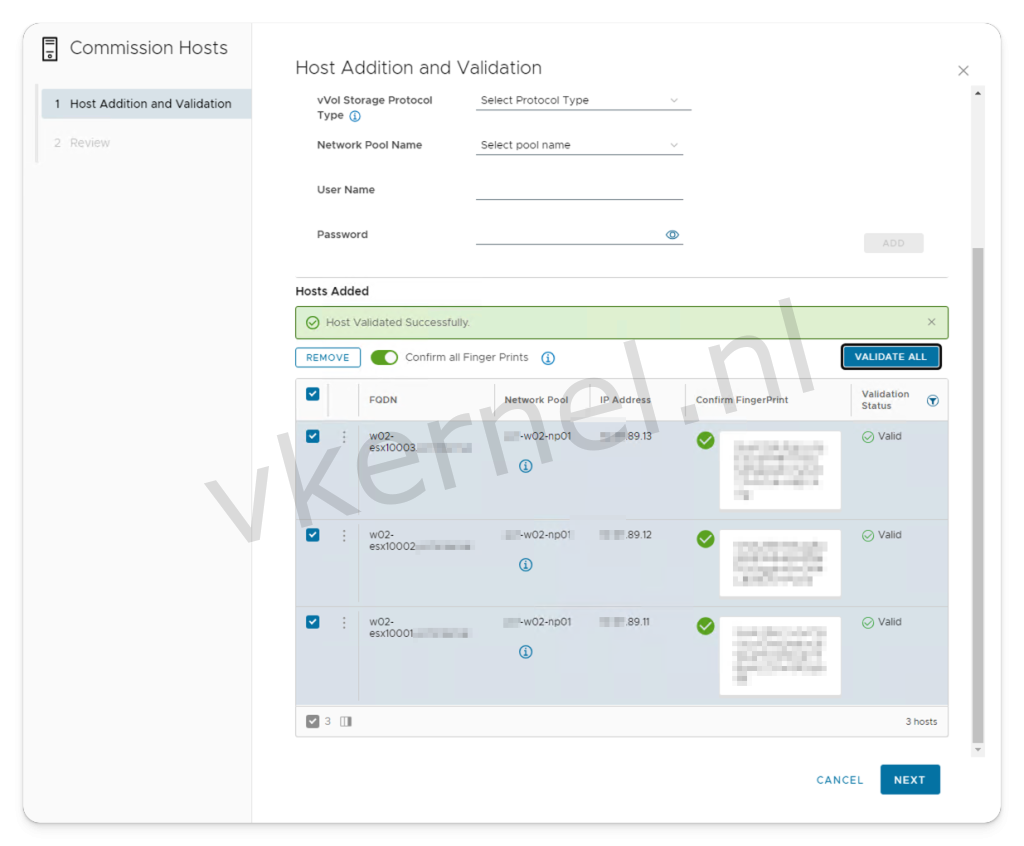
Before deploying a VI Workload Domain, we need to commission unassigned hosts into the SDDC Manager. To do this, click on Inventory, then Hosts, and select Commission Hosts to add the ESXi hosts that will be used for the VI Workload Domain deployment.
We will use the following details for commissioning the ESXi hosts:
| Setting | Value |
|---|---|
| Storage Type | vVol |
| vVol Storage Protocol Type | FC |
| Network Pool Name | The network pool we have created in the previous step |
| Username | Username to authenticate to the ESXi host |
| Password | Password to authenticate to the ESXi host |
Perform the validation of the Hosts and complete the wizard.
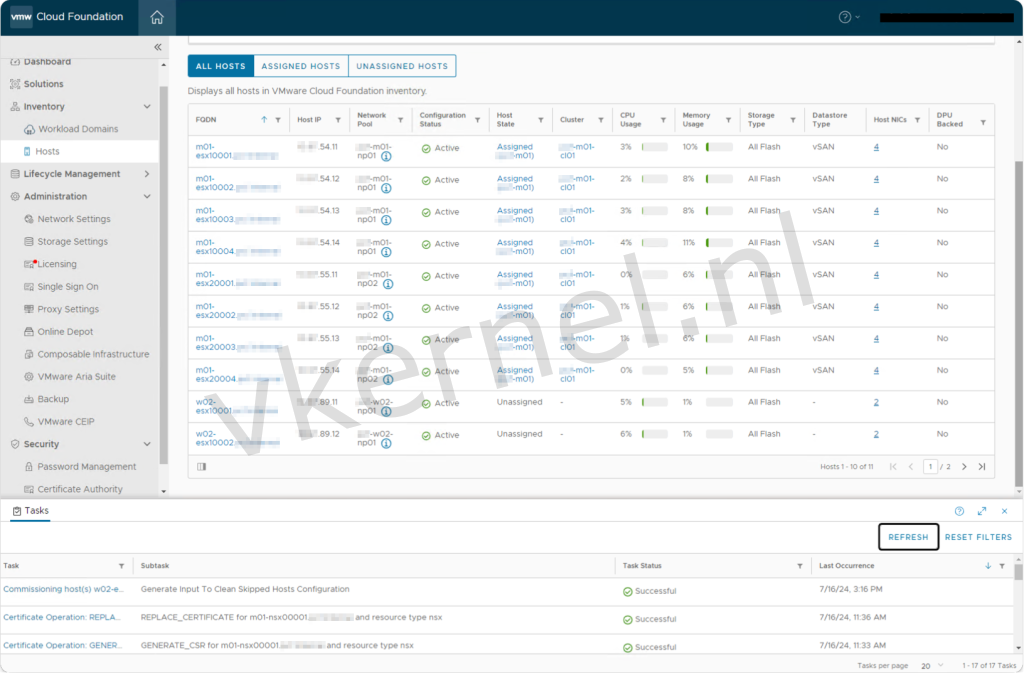
Once the task is completed, you will see the commissioned hosts listed as Unassigned.
Deploy VI Workload Domain
Start VI Workload Domain Wizard through the SDDC GUI
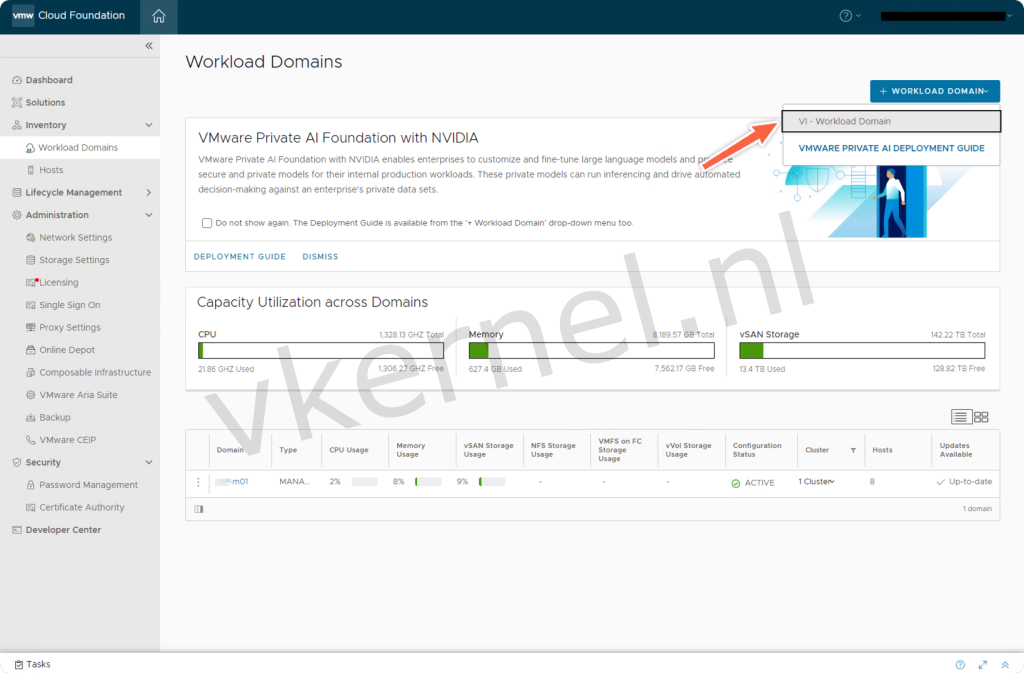
Everything is now in place to begin deploying the first VI Workload Domain. Click on Inventory, then Workload Domains, and select + Workload Domain to add a new VI Workload Domain.
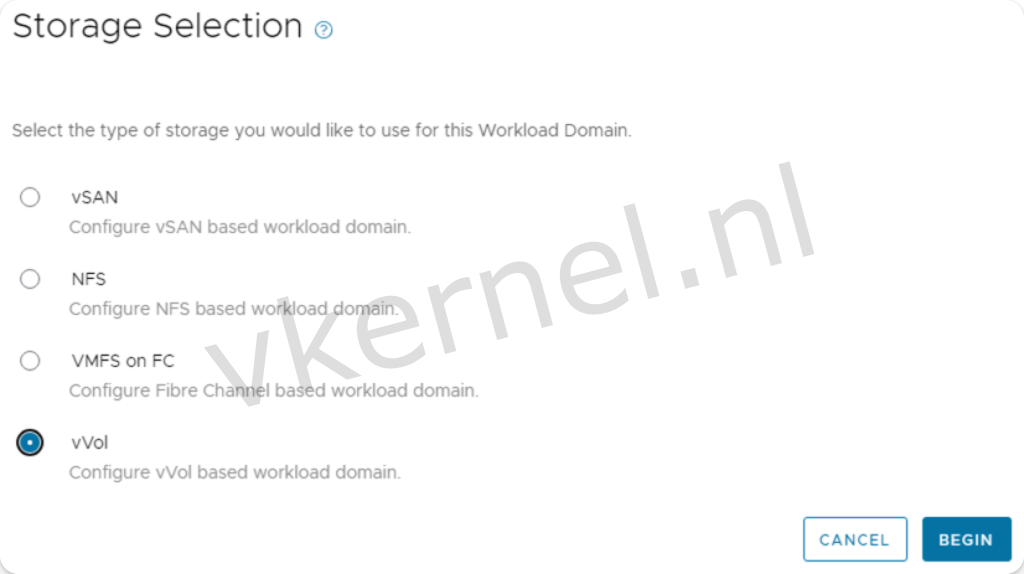
Select vVol in the Storage Selection view.
Fill in the Virtual Infrastructure name and the Organization Name.
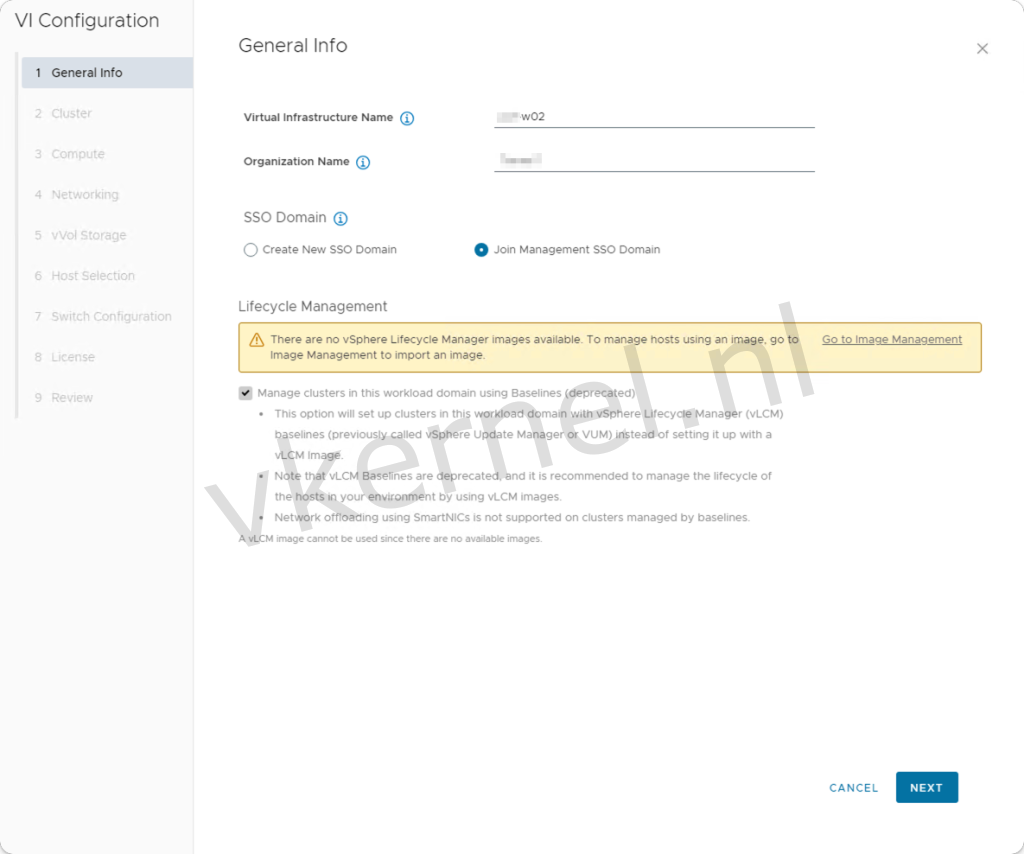
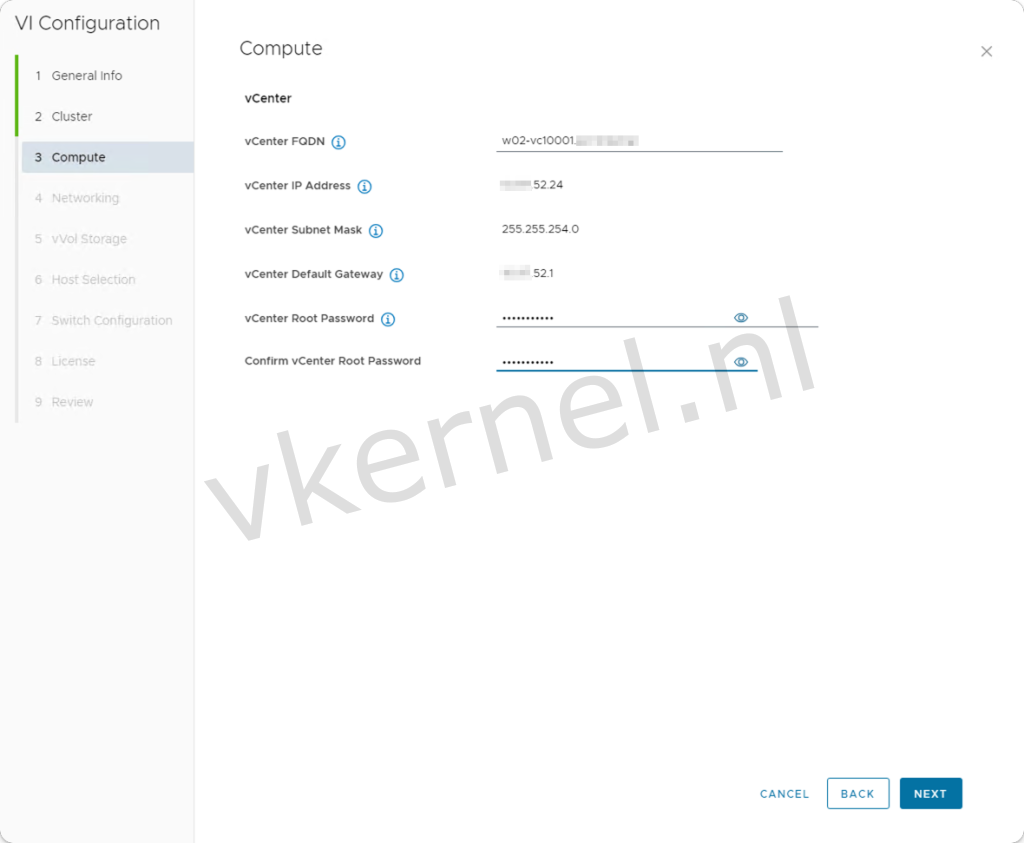
Enter the details for the vCenter that will be deployed for the VI Workload Domain. Ensure that the A and PTR records already exist for these DNS entries.
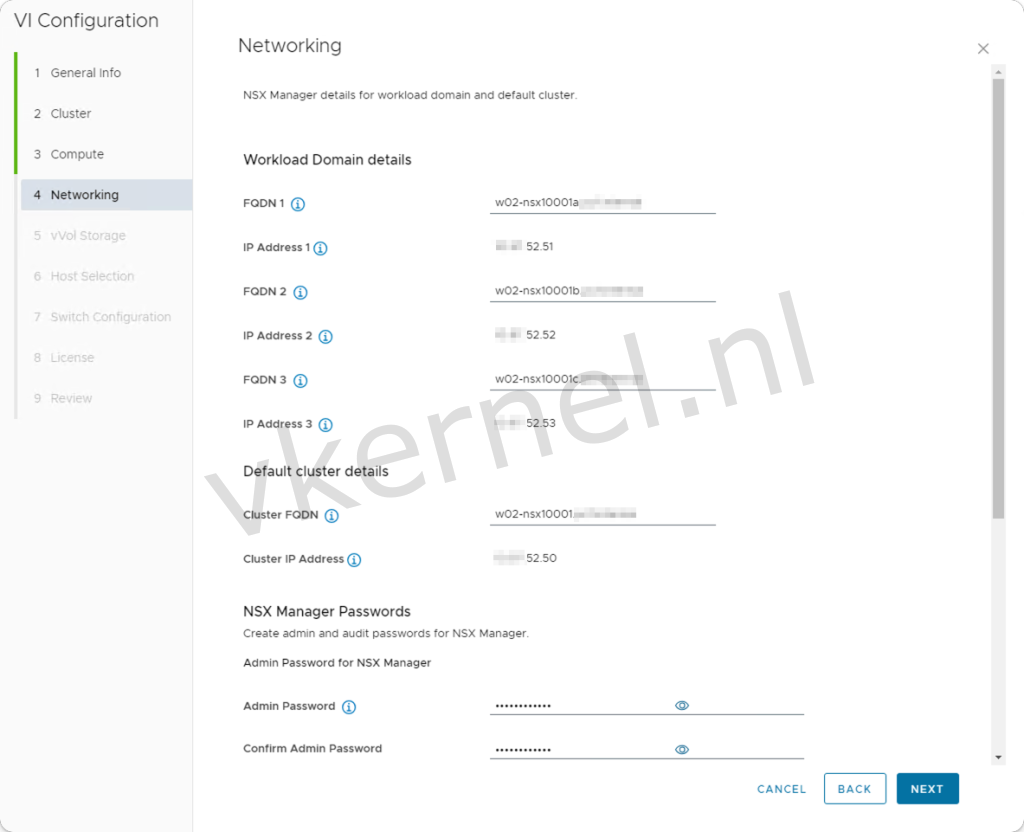
Enter the details for the NSX Nodes that will be deployed for the VI Workload Domain. Ensure that the A and PTR records already exist for these DNS entries.
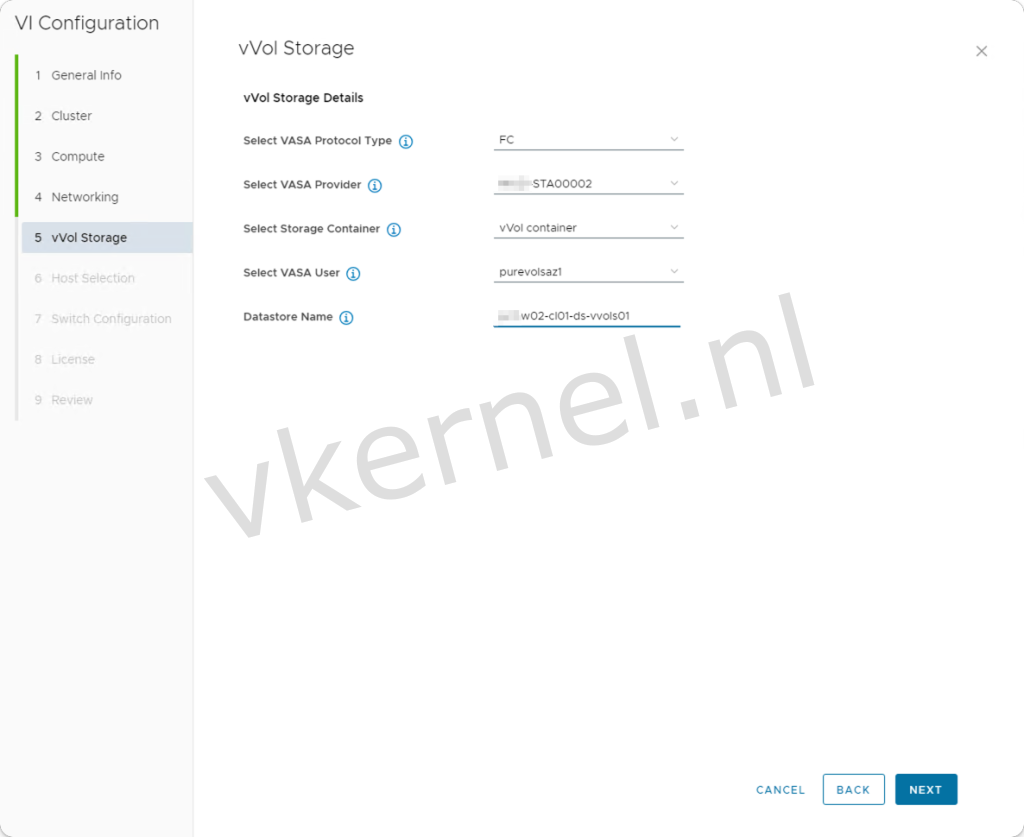
Enter the details for the vVol Storage that will be used for the VI Workload Domain.
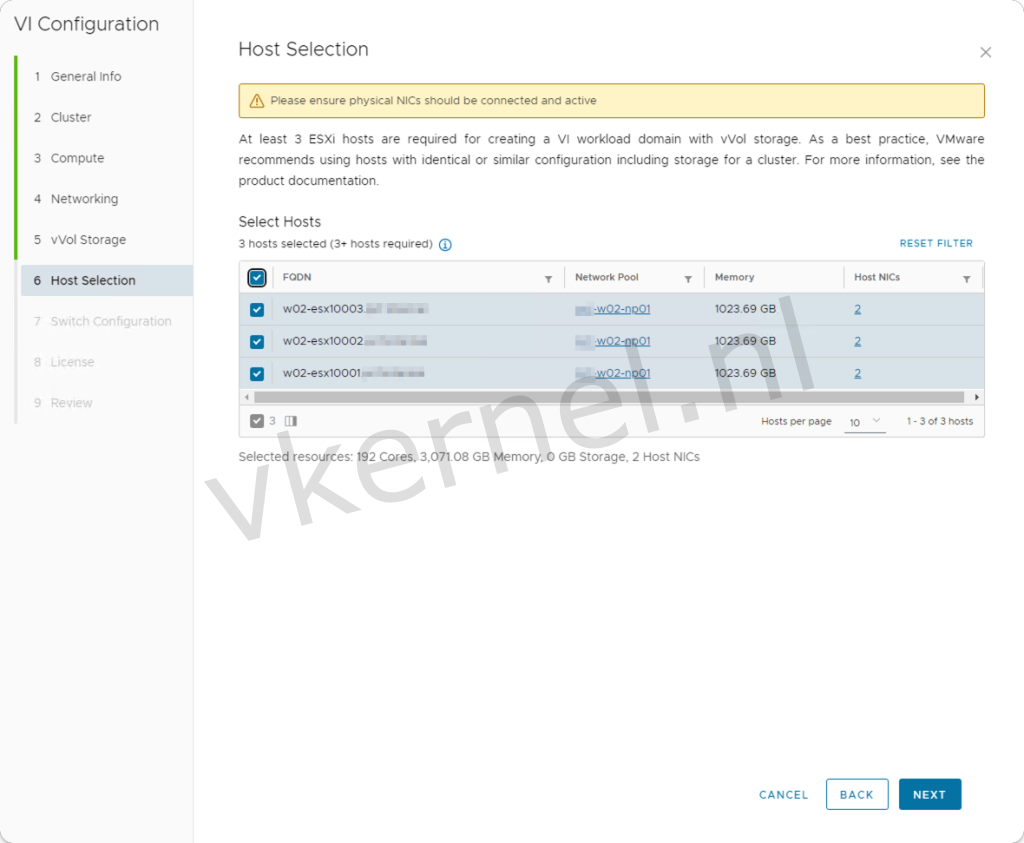
Select the Unassigned hosts that will be used for the deployment of the new VI Workload Domain.
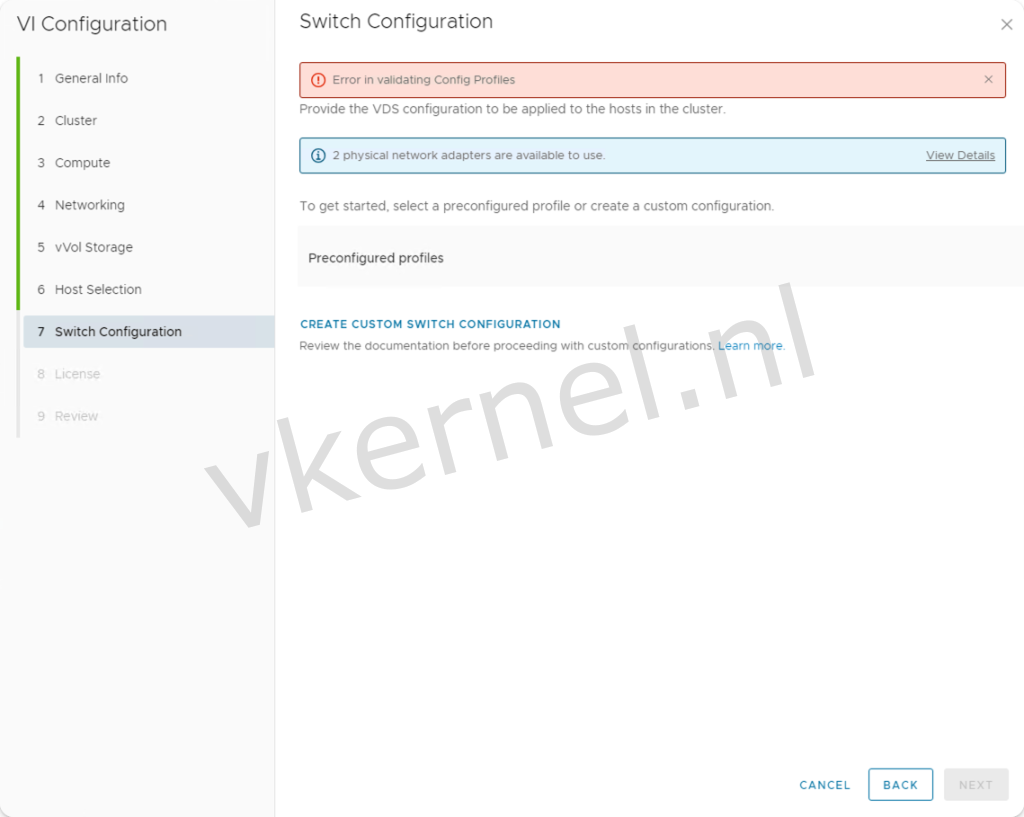
Encountered issue: Error in validating Config Profiles
Once clicked on next, we were getting the following error message in the wizard "Error in validating Config Profiles". This led us to find for additional information in the SDDC Manager log files.
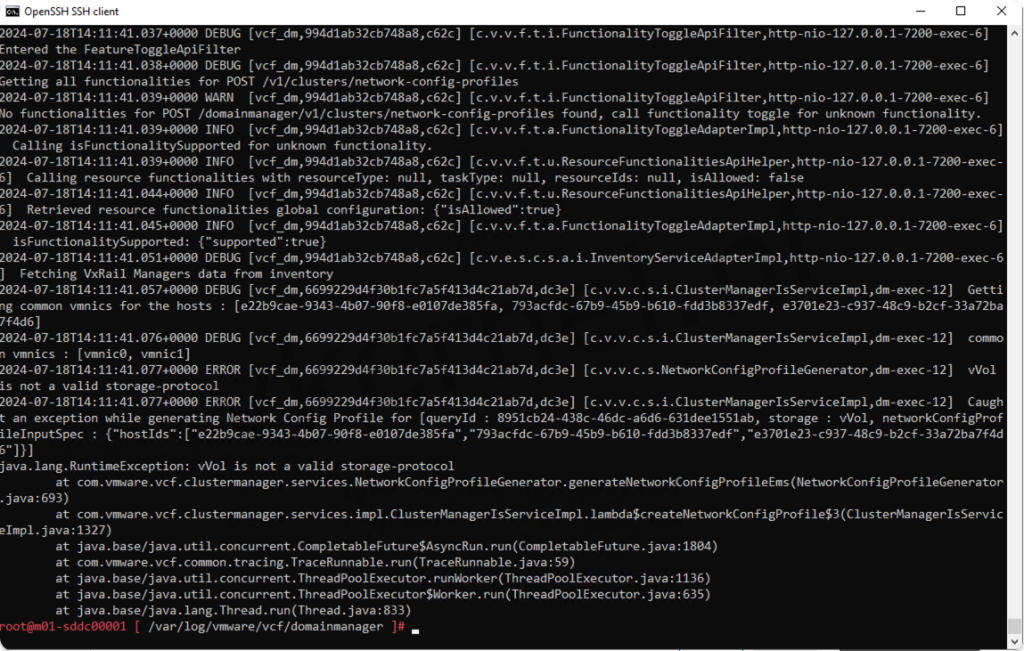
In the log file located at /var/log/vmware/vcf/domainmanager/domainmanager.log, we found the following error message: 'vVol is not a valid storage protocol. After some digging on the internet, we found a relevant knowledge base article on the VMware by Broadcom website."
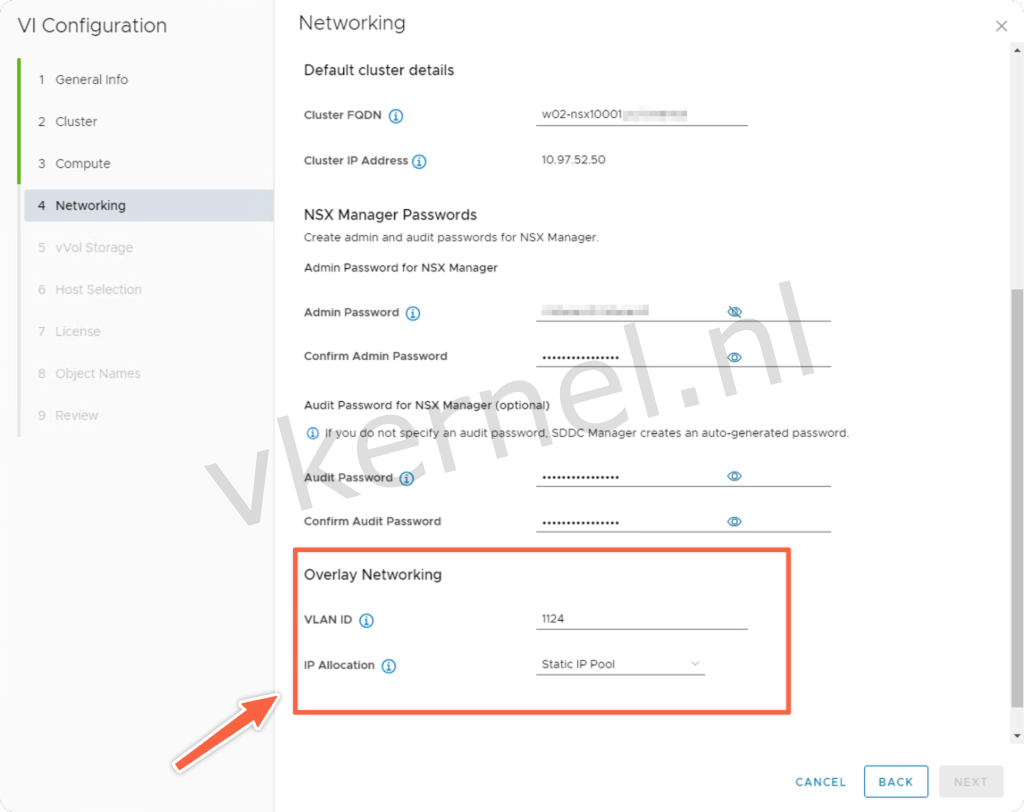
After applying the workaround from the knowledge base article and starting the VI Workload Domain deployment wizard, we encountered additional settings on page 4, Networking, related to Overlay Networking. After entering the VLAN ID and selecting the IP allocation, we were unable to proceed because the 'Next' button was not clickable. As a result, we couldn't complete the wizard. We contacted VMware, and they advised us to perform the VI Workload Domain deployment via API.
Start VI Workload Domain Wizard through the API
As adviced by VMware, we should initiate this task by the API. To do so, we need to click on Developer Center, then API Explorer, and select Hosts. Choose GET from the options. Enter "UNASSIGNED_USEABLE" as the value for the status parameter and click Execute.
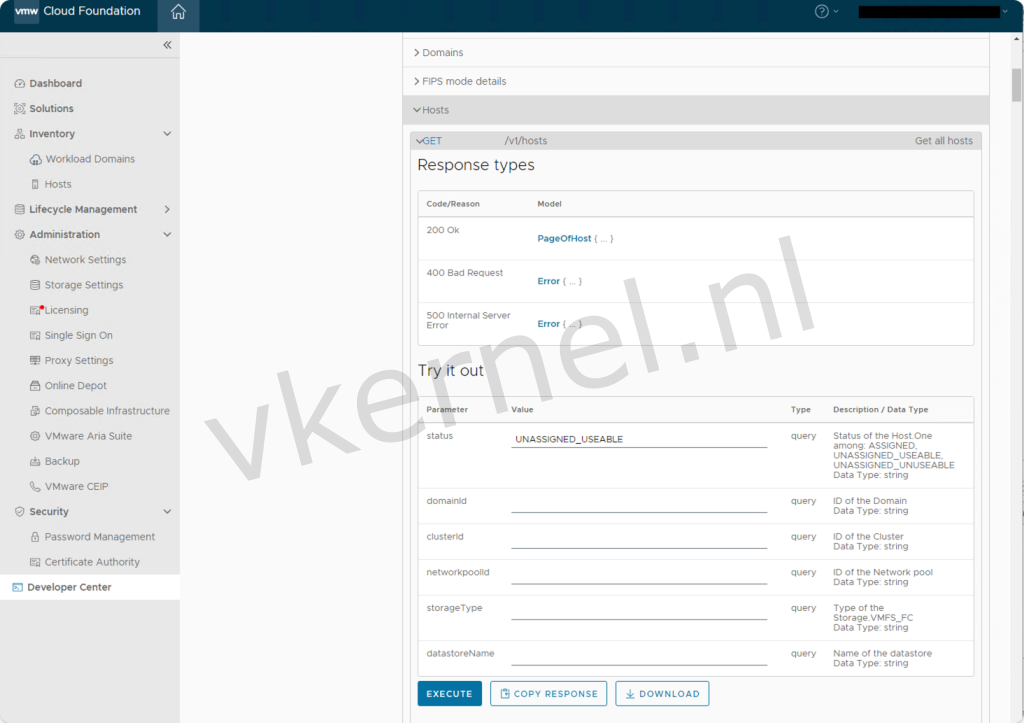
You will eventually receive a response with all the ESXi hosts that have the status UNASSIGNED_USEABLE. Note down all the IDs of these ESXi hosts, as we will use them in a later step.

The next step is to gather the VASA Provider details, including the IDs for the VASA Provider, Storage Container, and User. To do this, navigate to Developer Center, then API Explorer, and select VasaProviders. Choose GET from the options, and click Execute.
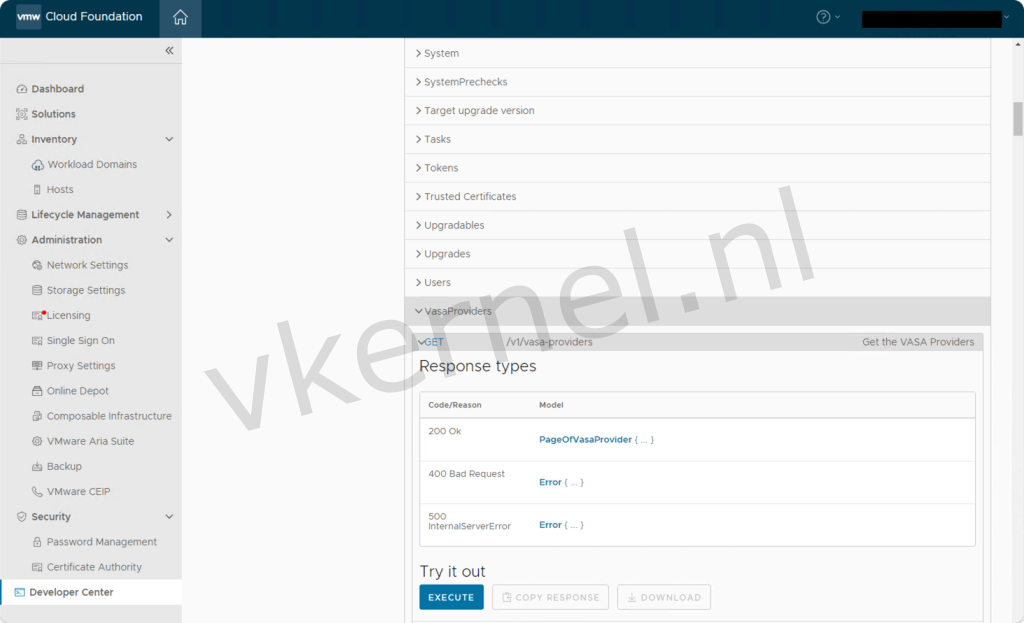
In the response below, you can see the IDs required to build the JSON specification for deploying a new VI Workload Domain with vVols. Make sure to note the necessary IDs.

Creating the JSON Specification
With all the information gathered from the previous steps, we can now build the JSON specification file that will be used to deploy the new VI Workload Domain. Below is an example of what I used during the creation of the VI Workload Domain via the API.
In our example, we will use shared SSO accross the Management Domain and all VI Workload Domains.
{
  "domainName": "w02",
  "orgName": "Organization Name",
  "vcenterSpec": {
    "name": "w02-vc10001",
    "networkDetailsSpec": {
      "ipAddress": "XX.XX.52.24",
      "dnsName": "w02-vc10001.domain.internal",
      "gateway": "XX.XX.52.1",
      "subnetMask": "255.255.254.0"
    },
    "rootPassword": "SuperSecretPassword",
    "datacenterName": "w02-dc",
    "vmSize": "medium"
  },
  "computeSpec": {
    "clusterSpecs": [
      {
        "name": "w02-cl01",
        "hostSpecs": [
          {
            "id": "e3701e23-c937-48c9-b2cf-33a72ba7f4d6",
            "licenseKey": "XXXXX-XXXXX-XXXXX-XXXXX-XXXXX",
            "hostNetworkSpec": {
              "vmNics": [
                {
                  "id": "vmnic0",
                  "vdsName": "w02-cl01-vds01"
                },
                {
                  "id": "vmnic1",
                  "vdsName": "w02-cl01-vds01"
                }
              ]
            }
          },
          {
            "id": "793acfdc-67b9-45b9-b610-fdd3b8337edf",
            "licenseKey": "XXXXX-XXXXX-XXXXX-XXXXX-XXXXX",
            "hostNetworkSpec": {
              "vmNics": [
                {
                  "id": "vmnic0",
                  "vdsName": "w02-cl01-vds01"
                },
                {
                  "id": "vmnic1",
                  "vdsName": "w02-cl01-vds01"
                }
              ]
            }
          },
          {
            "id": "e22b9cae-9343-4b07-90f8-e0107de385fa",
            "licenseKey": "XXXXX-XXXXX-XXXXX-XXXXX-XXXXX",
            "hostNetworkSpec": {
              "vmNics": [
                {
                  "id": "vmnic0",
                  "vdsName": "w02-cl01-vds01"
                },
                {
                  "id": "vmnic1",
                  "vdsName": "w02-cl01-vds01"
                }
              ]
            }
          }
        ],
        "datastoreSpec": {
          "vvolDatastoreSpecs": [
            {
              "name": "w02-cl01-ds-vvol01",
              "vasaProviderSpec": {
                "vasaProviderId": "78e3bf7c-572b-4105-ab92-9ae31ab64cff",
                "storageContainerId": "59cc9e82-7536-4576-9331-17d7a0568aa5",
                "storageProtocolType": "FC",
                "userId": "d55797ac-cc7b-454b-b84c-8f1188cd554b"
              }
            }
          ]
        },
        "networkSpec": {
          "vdsSpecs": [
            {
              "name": "w02-cl01-vds01",
              "mtu": 9000,
              "portGroupSpecs": [
                {
                  "name": "w02-cl01-vds01-pg-mgmt",
                  "teamingPolicy": "loadbalance_loadbased",
                  "transportType": "MANAGEMENT"
                },
                {
                  "name": "w02-cl01-vds01-pg-vmotion",
                  "teamingPolicy": "loadbalance_loadbased",
                  "transportType": "VMOTION"
                }
              ],
              "nsxtSwitchConfig": {
                "hostSwitchOperationalMode": "STANDARD",
                "transportZones": [
                  {
                    "name": "w02-tz-overlay01",
                    "transportType": "OVERLAY"
                  },
                  {
                    "name": "w02-tz-vlan01",
                    "transportType": "VLAN"
                  }
                ]
              }
            }
          ],
          "nsxClusterSpec": {
            "nsxTClusterSpec": {
              "geneveVlanId": "1124",
			  "ipAddressPoolSpec" : {
			     "name" : "w02-cl01-az1-esxi-tep01",
				 "description": "w02 AZ1 ESXi Host Overlay TEP IP Pool",
                 "subnets" : [ {
                   "ipAddressPoolRanges" : [ {
                     "start" : "XX.XX.97.20",
                     "end" : "XX.XX.97.60"
                   } ],
                   "cidr" : "XX.XX.97.0/24",
                   "gateway" : "XX.XX.97.1"
                 } ]
              }
            }
          }
        }
      }
    ]
  },
  "nsxTSpec": {
    "nsxManagerSpecs": [
      {
        "name": "w02-nsx10001a",
        "networkDetailsSpec": {
          "ipAddress": "XX.XX.52.51",
          "dnsName": "w02-nsx10001a.domain.internal",
          "gateway": "XX.XX.52.1",
          "subnetMask": "255.255.254.0"
        }
      },
      {
        "name": "w02-nsx10001b",
        "networkDetailsSpec": {
          "ipAddress": "XX.XX.52.52",
          "dnsName": "w02-nsx10001b.domain.internal",
          "gateway": "XX.XX.52.1",
          "subnetMask": "255.255.254.0"
        }
      },
      {
        "name": "w02-nsx10001c",
        "networkDetailsSpec": {
          "ipAddress": "XX.XX.52.53",
          "dnsName": "w02-nsx10001c.domain.internal",
          "gateway": "XX.XX.52.1",
          "subnetMask": "255.255.254.0"
        }
      }
    ],
    "vip": "XX.XX.52.50",
    "vipFqdn": "w02-nsx10001.domain.internal",
    "licenseKey": "XXXXX-XXXXX-XXXXX-XXXXX-XXXXX",
    "nsxManagerAdminPassword": "SuperSecretPassword",
    "nsxManagerAuditPassword": "SuperSecretPassword",
    "formFactor": "large"
  }
}
Perform validation of the JSON specification
We now have the JSON specification ready. Before applying the create VI Workload Domain task, we need to validate the JSON specifications.
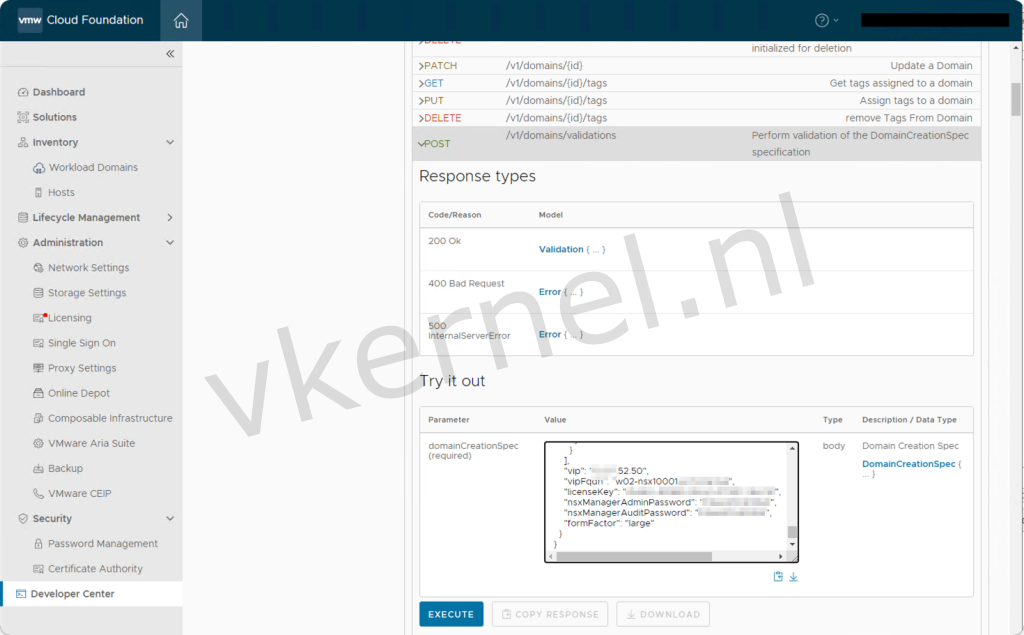
To do this, navigate to Developer Center, then API Explorer, and select Domains. Choose the POST /v1/domains/validations option, paste the JSON specification into the domainCreationSpec field, and click Execute.
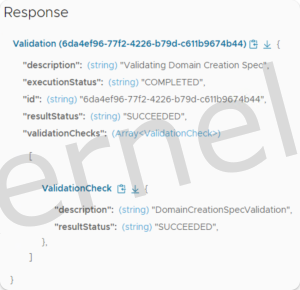
If the input is valid, you should receive a response with resultStatus set to "SUCCEEDED." Once you see this success message, you can proceed with creating the VI Workload Domain task.
Start VI Workload Domain deployment
After a successful validation of the JSON specification, you are ready to start the deployment of the VI Workload Domain.
To do this, navigate to the Developer Center, then to API Explorer, and select Domains. Choose the POST /v1/domains option and paste the JSON specification into the domainCreationSpec field, and click Execute.
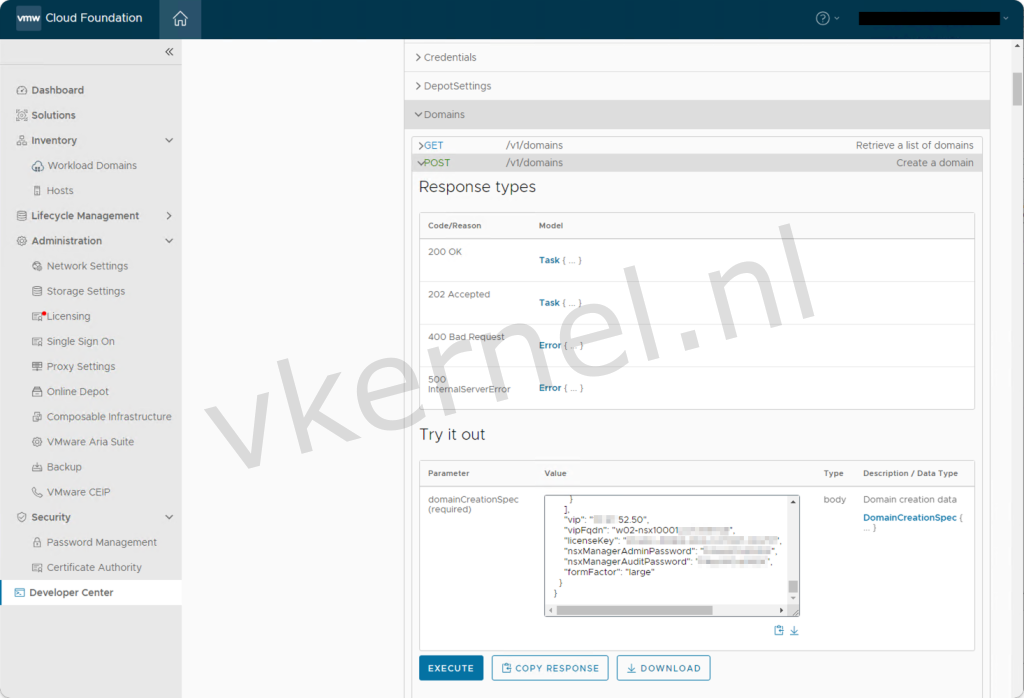
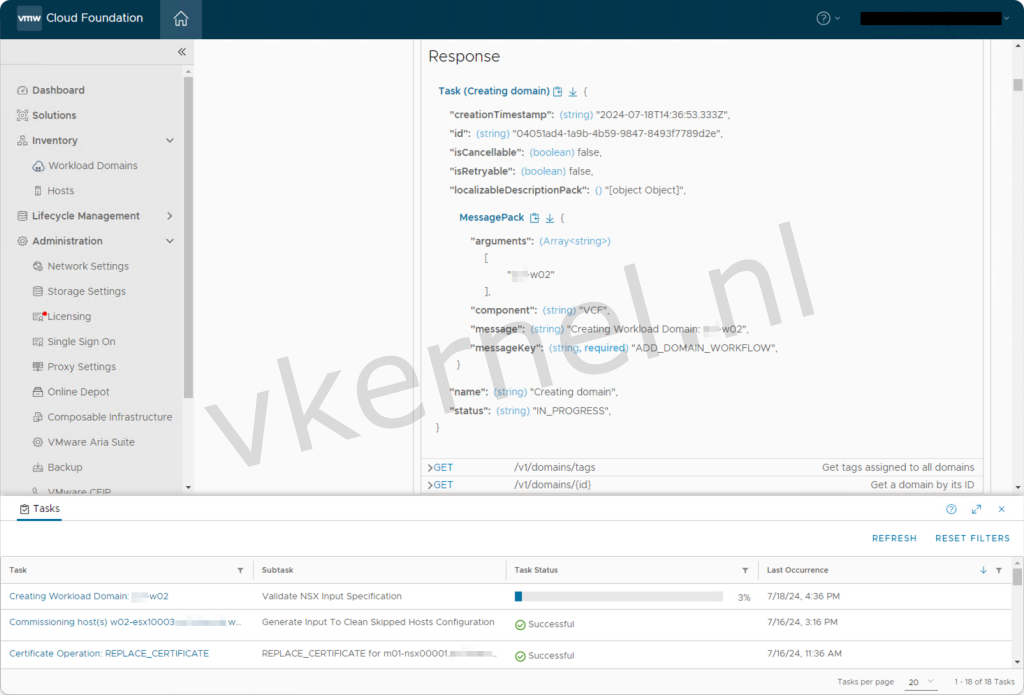
In the response, you should see a task created for the deployment of the VI Workload Domain. This task will also appear in the SDDC Manager's tasks view at the bottom of the screen.
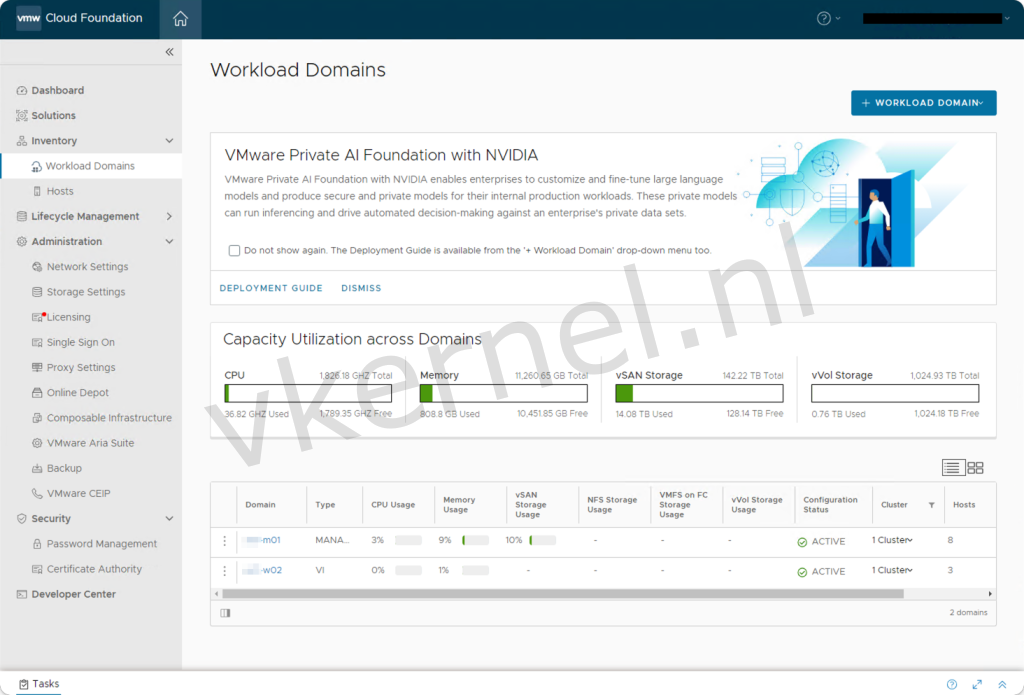
Once the task is completed, the newly deployed VI Workload Domain will appear in the Workload Domains view of the SDDC Manager. From this view, we can perform additional configurations, such as deploying NSX Edge nodes, managing the lifecycle, etc.
Optional: Deploy additional VI Workload Domain
To deploy additional VI Workload Domains that share the same SSO and NSX Managers (the NSX Manager from the first VI Workload Domain), you can use the same JSON specification with minor adjustments. To reuse the NSX Manager from the first VI Workload Domain, you need to specify these NSX Managers in the JSON specification (see example below).
{
  "domainName": "w03",
  "orgName": "Organization Name",
  "vcenterSpec": {
    "name": "w03-vc20001",
    "networkDetailsSpec": {
      "ipAddress": "XX.XX.52.25",
      "dnsName": "w03-vc20001.domain.internal",
      "gateway": "XX.XX.52.1",
      "subnetMask": "255.255.254.0"
    },
    "rootPassword": "P4ssW0rd!VC",
    "datacenterName": "w03-dc01",
    "vmSize": "medium"
  },
  "computeSpec": {
    "clusterSpecs": [
      {
        "name": "w03-cl01",
        "hostSpecs": [
          {
            "id": "4dcabce7-7463-4656-a029-5053ebfaecf8",
            "licenseKey": "XXXXX-XXXXX-XXXXX-XXXXX-XXXXX",
            "hostNetworkSpec": {
              "vmNics": [
                {
                  "id": "vmnic0",
                  "vdsName": "w03-cl01-vds01"
                },
                {
                  "id": "vmnic1",
                  "vdsName": "w03-cl01-vds01"
                }
              ]
            }
          },
          {
            "id": "ecb7c0b5-787d-447e-adc4-95678f43ef5a",
            "licenseKey": "XXXXX-XXXXX-XXXXX-XXXXX-XXXXX",
            "hostNetworkSpec": {
              "vmNics": [
                {
                  "id": "vmnic0",
                  "vdsName": "w03-cl01-vds01"
                },
                {
                  "id": "vmnic1",
                  "vdsName": "w03-cl01-vds01"
                }
              ]
            }
          },
          {
            "id": "820d5785-2ea4-4e13-b4f9-de9ebddeb320",
            "licenseKey": "XXXXX-XXXXX-XXXXX-XXXXX-XXXXX",
            "hostNetworkSpec": {
              "vmNics": [
                {
                  "id": "vmnic0",
                  "vdsName": "w03-cl01-vds01"
                },
                {
                  "id": "vmnic1",
                  "vdsName": "w03-cl01-vds01"
                }
              ]
            }
          }
        ],
        "datastoreSpec": {
          "vvolDatastoreSpecs": [
            {
              "name": "w03-cl01-ds-vvol01",
              "vasaProviderSpec": {
                "vasaProviderId": "e3f15d50-26e9-4438-948f-d996b993b56b",
                "storageContainerId": "3039fa13-0a9b-428a-a6e3-4fd21152f472",
                "storageProtocolType": "FC",
                "userId": "13da37a7-3b35-4ed5-805d-fdc4e9584626"
              }
            }
          ]
        },
        "networkSpec": {
          "vdsSpecs": [
            {
              "name": "w03-cl01-vds01",
              "mtu": 9000,
              "portGroupSpecs": [
                {
                  "name": "w03-cl01-vds01-pg-mgmt",
                  "teamingPolicy": "loadbalance_loadbased",
                  "transportType": "MANAGEMENT"
                },
                {
                  "name": "w03-cl01-vds01-pg-vmotion",
                  "teamingPolicy": "loadbalance_loadbased",
                  "transportType": "VMOTION"
                }
              ],
              "nsxtSwitchConfig": {
                "hostSwitchOperationalMode": "STANDARD",
                "transportZones": [
                  {
                    "name": "w03-tz-overlay01",
                    "transportType": "OVERLAY"
                  },
                  {
                    "name": "w03-tz-vlan01",
                    "transportType": "VLAN"
                  }
                ]
              }
            }
          ],
          "nsxClusterSpec": {
            "nsxTClusterSpec": {
              "geneveVlanId": "2134",
			  "ipAddressPoolSpec" : {
			     "name" : "w03-cl01-az1-esxi-tep01",
				 "description": "w03 AZ1 ESXi Host Overlay TEP IP Pool",
                 "subnets" : [ {
                   "ipAddressPoolRanges" : [ {
                     "start" : "XX.XX.98.20",
                     "end" : "XX.XX.98.60"
                   } ],
                   "cidr" : "XX.XX.98.0/24",
                   "gateway" : "XX.XX.98.1"
                 } ]
              }
            }
          }
        }
      }
    ]
  },
  "nsxTSpec": {
    "nsxManagerSpecs": [
      {
        "name": "w02-nsx10001a",
        "networkDetailsSpec": {
          "ipAddress": "XX.XX.52.51",
          "dnsName": "w02-nsx10001a.domain.internal",
          "gateway": "XX.XX.52.1",
          "subnetMask": "255.255.254.0"
        }
      },
      {
        "name": "w02-nsx10001b",
        "networkDetailsSpec": {
          "ipAddress": "XX.XX.52.52",
          "dnsName": "w02-nsx10001b.domain.internal",
          "gateway": "XX.XX.52.1",
          "subnetMask": "255.255.254.0"
        }
      },
      {
        "name": "w02-nsx10001c",
        "networkDetailsSpec": {
          "ipAddress": "XX.XX.52.53",
          "dnsName": "w02-nsx10001c.domain.internal",
          "gateway": "XX.XX.52.1",
          "subnetMask": "255.255.254.0"
        }
      }
    ],
    "vip": "XX.XX.52.50",
    "vipFqdn": "w02-nsx10001.domain.internal"
  }
}

