I have deployed a Cloud Director 10.2 setup in my home lab, but I haven't configured the public address and a wildcard certificate yet for the web GUI and the console proxy. In this blog post, I will show you how to request a let's encrypt wildcard certificate, and I will show you how to configure the wildcard certificate in the Cloud Director cell. Let's Encrypt is a nonprofit certificate authority where you can request a free SSL certificate.
How to request an wildcard certificate (LetsEncrypt)
Prerequisites
- Powershell Module Posh-ACME (url)
Install Posh-ACME module
There are two modes for installing the module. You can install it for every user or for the current user. The example below will install the module for every user. Start an administrative Powershell session and execute the following command:
Install-Module -Name Posh-ACME -Scope AllUsers
Set the ExecutionPolicy to RemoteSigned and import the Posh-ACME module in Powershell. After importing the Posh-ACME module, new cmdlets will become available.
Set-ExecutionPolicy RemoteSigned -Scope CurrentUser -Force
Import-Module Posh-ACME
Connect to the ACME v2 production endpoint to request wildcard certificates. Check this link for more information. Use the Set-PAServer to switch to the ACME v2 production endpoint. Use the Get-PAServer to verify the current configured PA (Picking a) server.
Set-PAServer https://acme-v02.api.letsencrypt.org/directory
Get-PAServer
Request the wildcard certificate
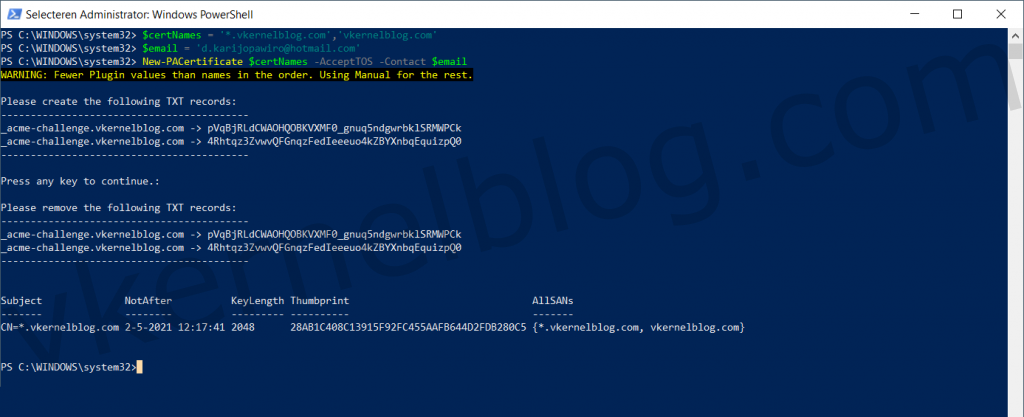
We now have everything in place to do a certificate request with the Posh-ACME module. In the example below, you will see a variable named $certNames containing the domain names (root and all subdomains), that will be used for in the SAN fields. There is also a variable named $email containing a mail address, that will be used during the certificate request at Let's Encrypt. This mail address will also be used for notification when the certificate is about to expire.
$certNames = '*.domain.com','domain.com'
$email = '[email protected]'
New-PACertificate $certNames -AcceptTOS -Contact $email
The next step is to create two TXT records under my vkernelblog.com domain. These two TXT records will be used to validate your domain name. In my case, I needed to create two TXT records with the following values:
_acme-challenge.vkernelblog.com --> pVqBjRLdCWAOHQOBKVXMF0_gnuq5ndgwrbklSRMWPCk
_acme-challenge.vkernelblog.com --> 4Rhtqz3ZvwvQFGnqzFedIeeeuo4kZBYXnbqEquizpQ0
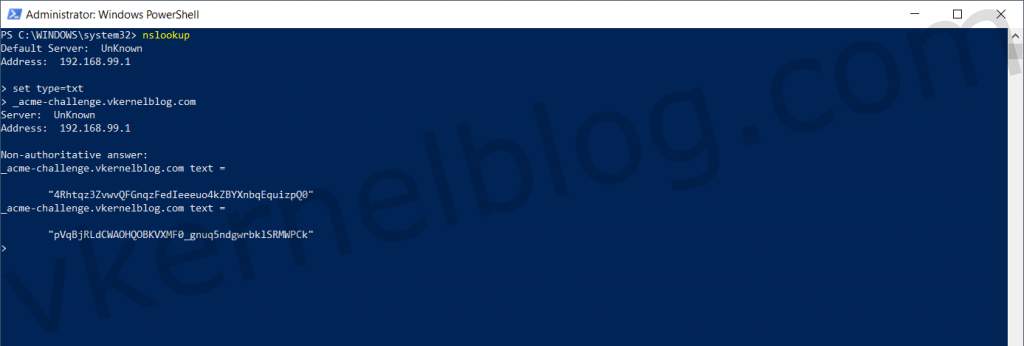
Make sure to test the TXT records first before continuing the script. Use nslookup to verify the two TXT records. Use the following commands to do so:
nslookup <enter>
set type=txt <enter>
_acme-challenge.domain.com
The ownership of the domain has now been validated, so we can now proceed the script by pressing enter.
The request has been completed and we are now able to remove the two TXT records. We now have the requested certificate. To access the certificate files, open windows Explorer and go to the following location: %LOCALAPPDATA%\Posh-ACME. You will find all the needed certificate files in a sub folder that contains the name of your domain.
Import wildcard certificate in Cloud Director.
According to the documentation of Cloud Director, we need to have a certificate in a PFX format. In the previous picture we have a cert.pfx file, but the password mentioned in the order.json file wasn't working for me.
So I created a new PFX file named wildcard.vkernelblog.com.pfx with the private key and the CA certificate files. You will be asked for a password that will be used for the PFX file. Make a note of the password, because we will need it later on.
openssl pkcs12 -export -out wildcard.vkernelblog.com.pfx -inkey cert.key -in cert.cer-certfile chain1.cer
Upload the newly created PFX file to the /tmp directory of the Cloud Director cell.
Create a new certificates keystore file.
Let's open a SSH session to your Cloud Director cell and change directory to /opt/vmware/vcloud-director/jre/bin.
We need to create a new keystore file containing two entries, one entry for the web GUI and the other one for the console proxy.
Execute the following command to create a new keystore named certificates.ks, that import the newly created PFX certificate. In my example, I created a keystore with the password VMware1!
Make a note of the storepass value. With this password you can perform task like: importing entries in the keystore or listing entries of the keystore.
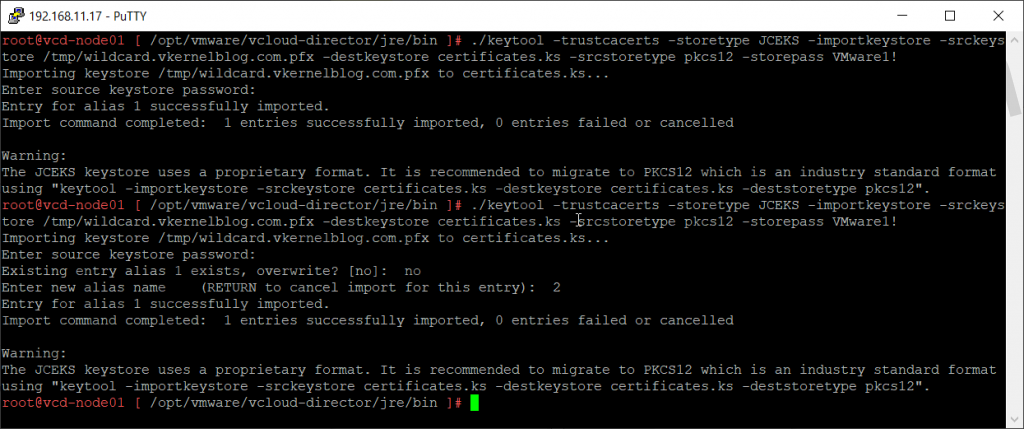
./keytool -trustcacerts -storetype JCEKS -importkeystore -srckeystore /tmp/wildcard.vkernelblog.com.pfx -destkeystore certificates.ks -srcstoretype pkcs12 -storepass VMware1!
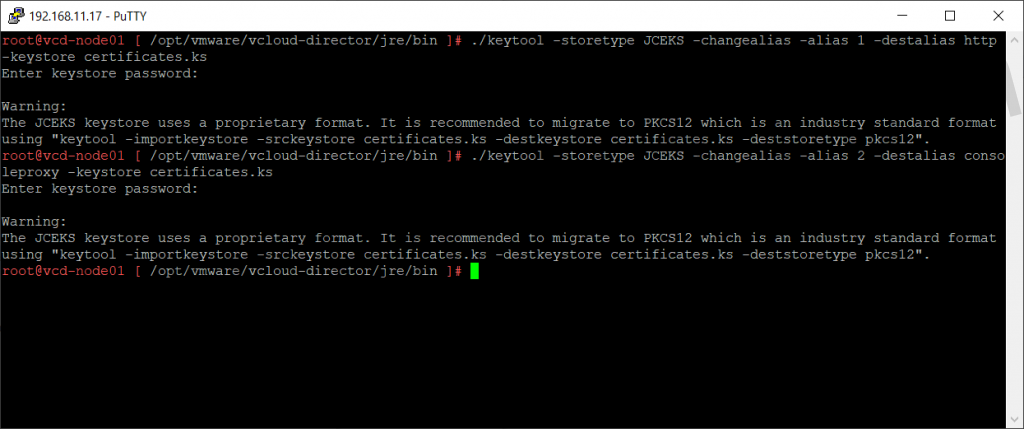
I need to execute the previous command twice (see screenshot) because we need to have two entries (1 for http and the other for consoleproxy). Make sure you are not overwriting the first entry, and make sure you are giving the second entry the alias: 2.
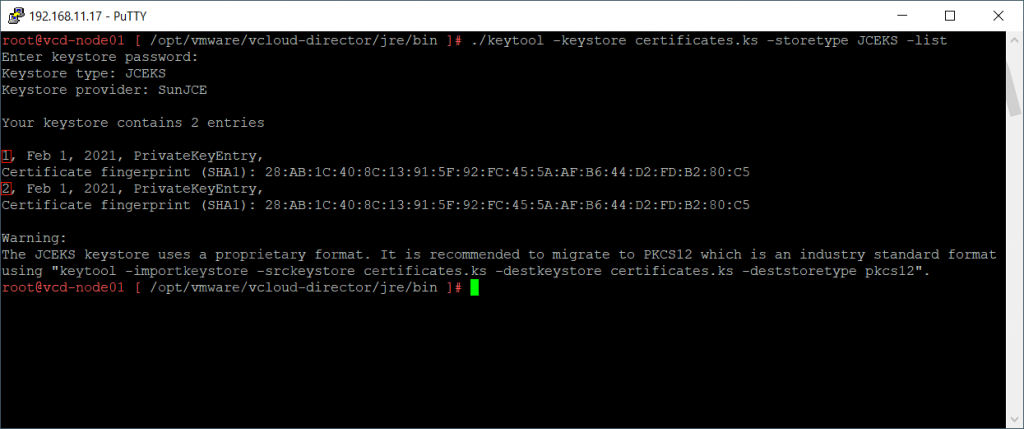
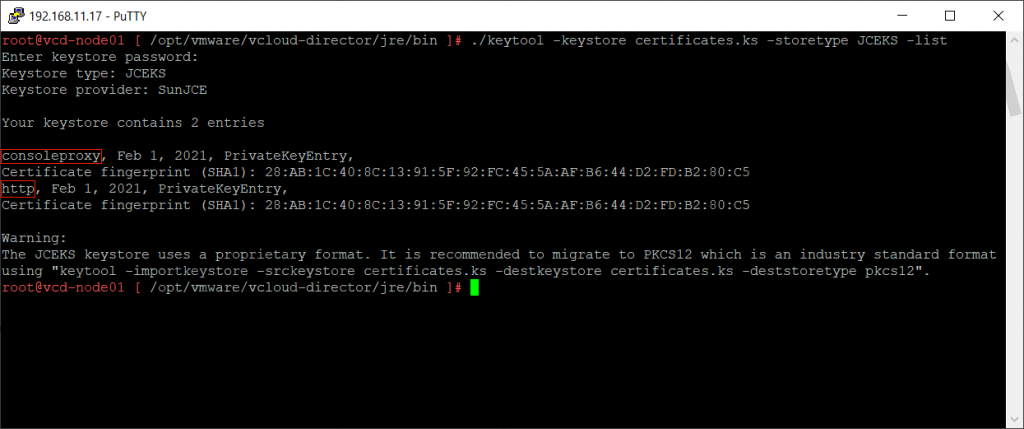
Let's list all entries in the newly created keystore file. Use the storepass password we have noted down earlier.
./keytool -keystore certificates.ks -storetype JCEKS –list
In the previous picture you will see the alias names of the two entries. The alias for the first entry is 1, and the alias for the second entry is 2.
We will need to change the alias names for those two entries. One entry need to have the alias http and the other entry should have the alias consoleproxy.
Use again the storepass password you have noted down earlier.
./keytool -storetype JCEKS -changealias -alias 1 -destalias http -keystore certificates.ks
./keytool -storetype JCEKS -changealias -alias 2 -destalias consoleproxy -keystore certificates.ks
Verify the changes by listing all entries again of the certificates.ks keystore file.
Change the owner and permissions of the certificates.ks file.
chown vcloud:vcloud /opt/vmware/vcloud-director-bin/jre/bin/certificates.ks
chmod 600 /opt/vmware/vcloud-director-bin/jre/bin/certificates.ks
Configure the Cloud Director Cell with the new keystore
We should now configure the Cloud Director Cell to use the newly created keystore file named certificates.ks. Execute the following command on the Cloud Director cell. Change directory to /opt/vmware/vcloud-director/bin.
./cell-management-tool certificates -j -p -k /opt/vmware/vcloud-director/jre/bin/certificates.ks -w VMware1!
To update the Cloud Director service with the new certificates, we need to restart the vmware-vcd services.
service vmware-vcd stop
service vmware-vcd start
Configure the public address (if not configured)
Login on the web GUI of the cell https://ipaddressofcell/provider to configure the public address.
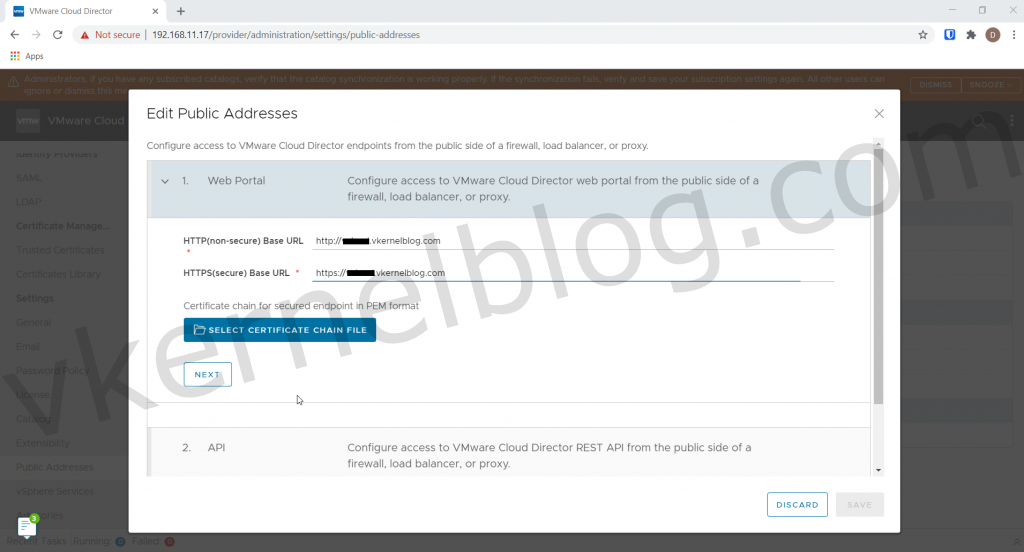
Navigate to Administration --> Public Addresses and click on edit.
Change the Web Portal public address as shown below:
I do not select any certificate chain file, because it's already in place on the cell.
Click Save to continue
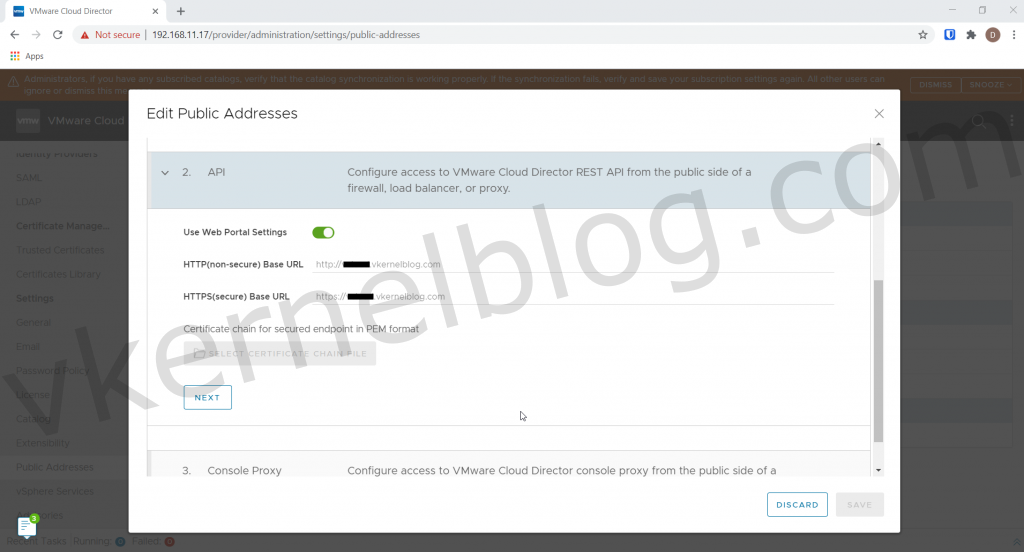
On the next page of the wizard, select Use Web Portal Settings.
Click Save to continue
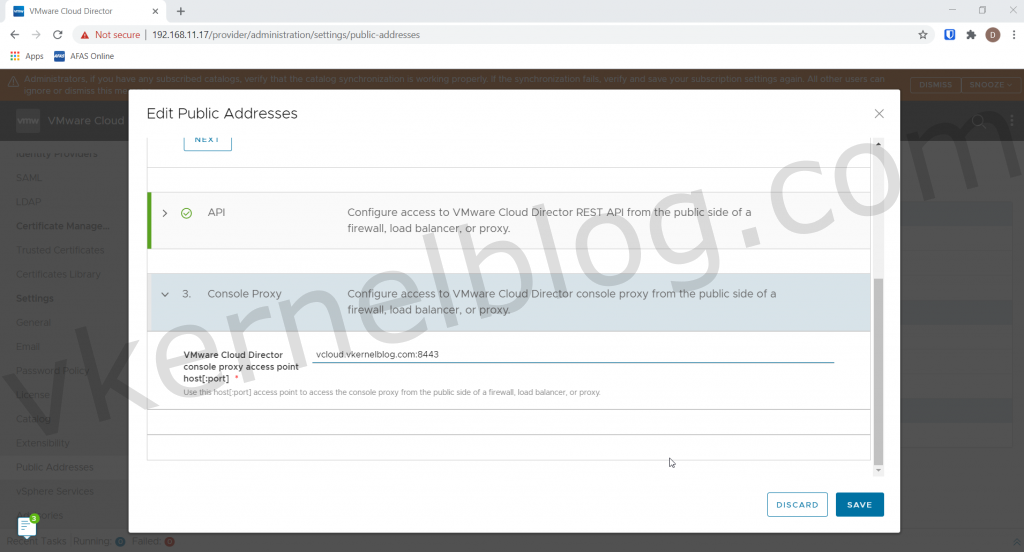
Enter the public address with a custom port that will be used for the console proxy.
Click Save to continue
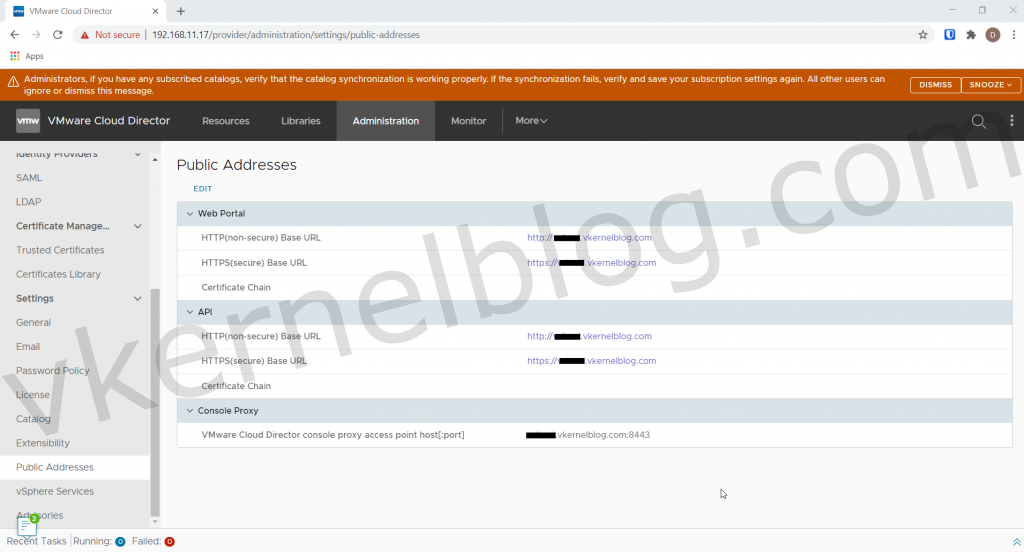
We have now successfully configured the public addresses on the Cloud Director cell. We should now be able to test and validate.
Validating the public address and certificate
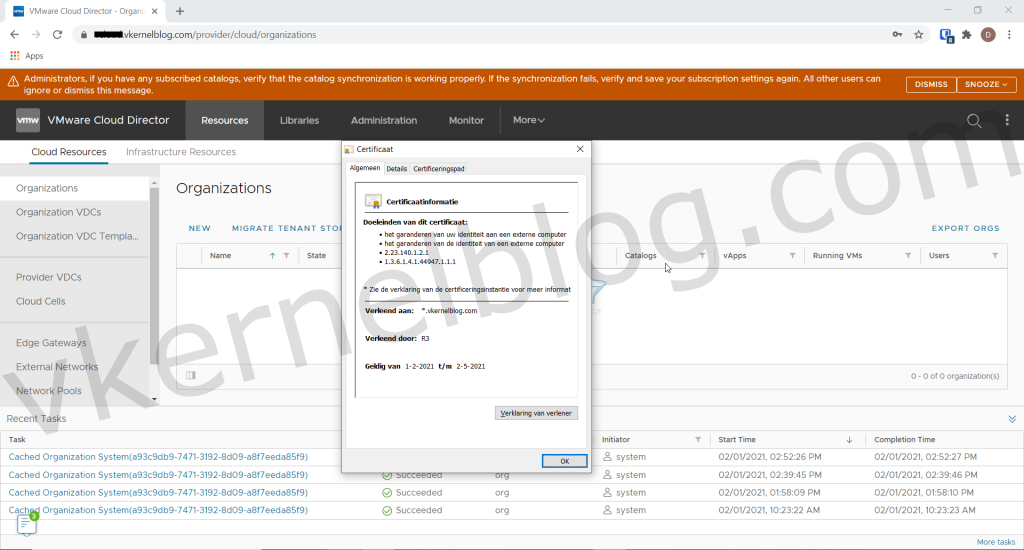
Let's open a new browser session to the configured public address and verify the SSL certificate. As you can see, the web GUI is using the let's encrypt wildcard certificate.

The console proxy is also working as expected.


